Introduction
About this guide
This guide has been written to explain how to configure and use the Photo Validator component.
The Photo Validator component allows customers to take and/or upload a passport style photo. This photo is then validated to ensure that the photo is clear, unobstructed and meets the criteria of a passport style photo.
Configuration
Configuring the Photo Validator Component
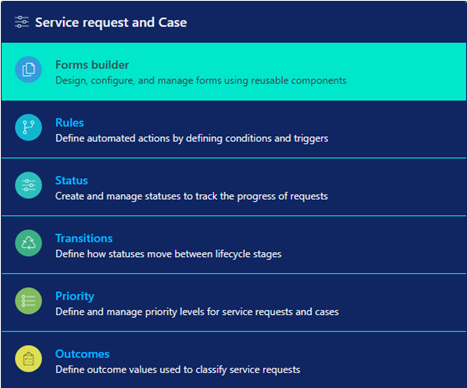
To add this component to a form, Go to Administration, then click on Forms Builder in the Service Request and Case area:
Next, select the catalogue and form in which you want to add the component to.
Add an image and label it accordingly. For example, I have labeled the component ‘Upload a photo’
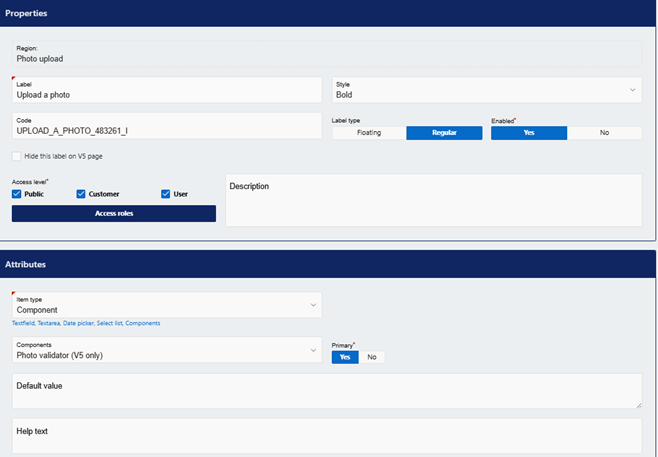
In the Advanced region, you can select a document type. Configuring this will categories the image on the Service Request under the ‘attachments’ region.
In the Validations region, by enabling ‘is required’ you can force the submitter to upload the photo.
Then, click ‘add’ to add the Photo Validator component to the form.
Note – This component is only available on the customer portal.
Component Functionality
How does the Component Work?
When a submitter accesses the form and meets the component, the submitter has one of two choices:
Upload an image – this opens the file explorer (or photos app)
Take a photo – this opens the camera application and automatically selects the image when a picture is taken.
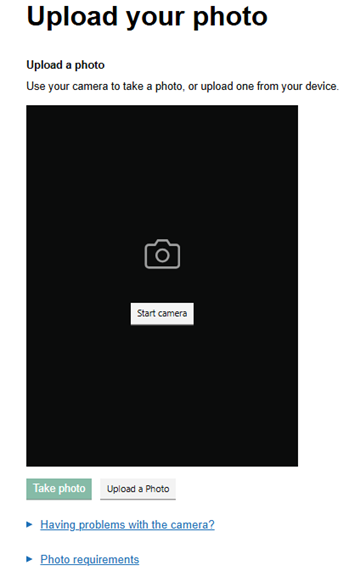
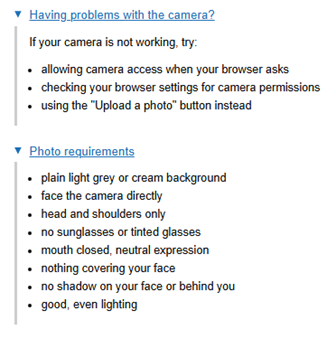
Help text can be opened below the component to help submitters:
Once an image has been selected, the component will run the following checks:
Resolution sufficient – this ensures that the image is not too small
Face detected – this checks for a face in the image
Only one face in photo – this ensures that only one face is visible in the image
Face centred correctly – this checks for the face to be central in the image
Head size correct – ensures that the head occupies the right amount of the image
Head straight, not tilted – checks that the person is facing the camera
Good Lighting – checks that the face is adequately lit
Photo is sharp and clear – checks for blurry images
Background acceptable – ensures that the background is plain and adequate.
There are 3 statuses of each of these checks:
Passed – This means that the image passed this check.
Warning – This means that the image is still usable, but is close to a threshold and may require review
Failed – the photo does not meet this check and must be retaken or reuploaded.
Component Outcomes
When a photo fails the validation, the ‘use this photo’ button will be unavailable, forcing the user to retry, which they can do by clicking the ‘retake photo’ button. This clears the component.
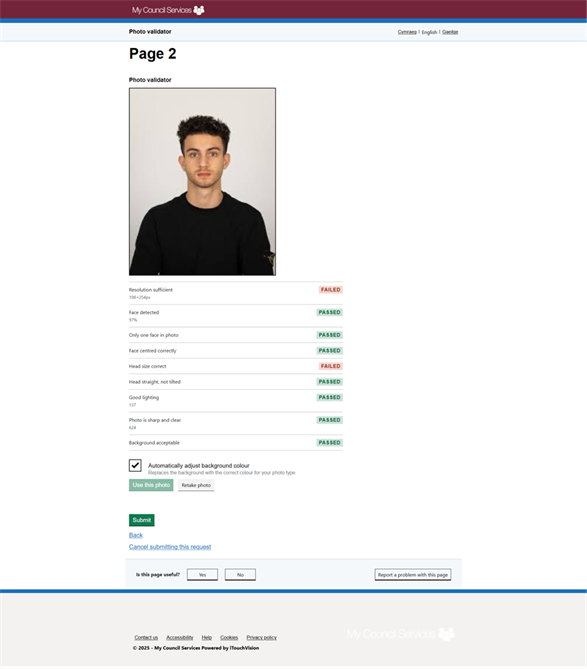
For a photo to pass validation, there must be no Failed checks.
Once an image that passes these checks is uploaded, the submitter can click on ‘use this photo’ to finish using the component.
Note - There is a cost associated with the use of this component. For more information, please contact isupport@abavus.co.uk
Was this article helpful?
That’s Great!
Thank you for your feedback
Sorry! We couldn't be helpful
Thank you for your feedback
Feedback sent
We appreciate your effort and will try to fix the article