Introduction
About this guide
Organisations are entities within MCS that can represent multiple accounts. These often represent businesses, charities or organisations within the council, such as waste collection teams.
These organisations can be used in rules, can own SRs, and can be configured to allow customers to view SRs from submitters from within the organisation
Creating and Editing Organisations
Configuring Organisations
There are two ways to create / edit an organisation:
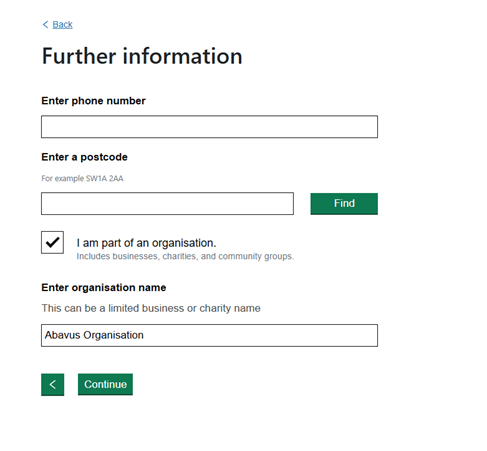
Customer Portal - Customers can be created by customers when registering. On the ‘Further Information’ page, the customer can confirm that they are part of an organisation, where the Organisation can be created. When created, they will become an Organisation Administrator, allowing them to edit the organisation.
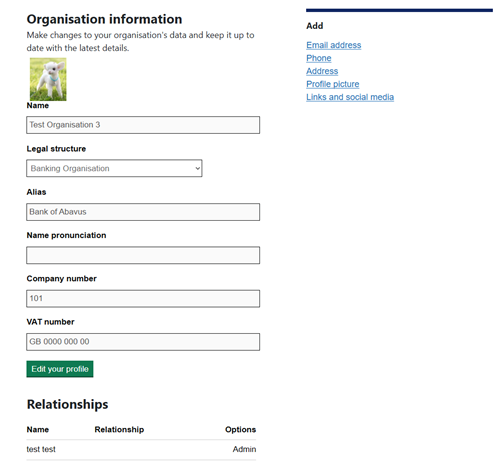
Organisation members can then view their organisation by going to Menu > My Account > Organisations > View. If the customer is an Organisation Administrator, they can edit the Organisation’s details or add details, such as contact details, profile pictures and links.
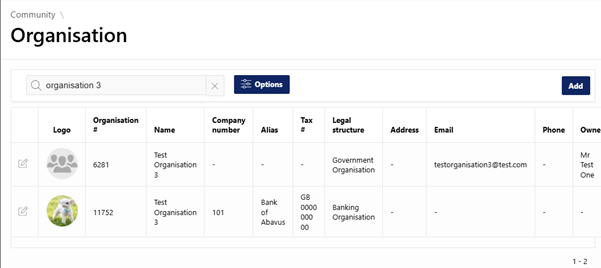
Administration Portal – Administrators can go to Community > Organisation. From here, they can search for an organisation, and click on the ‘edit’ icon to edit the details:
To create an organisation, click ‘add’ on the organisation screen to a page where the Organisation can be named, and other details can be added:

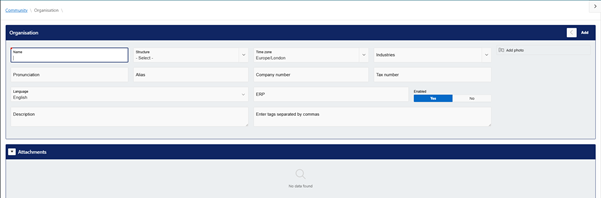
Once the mandatory details are added, you can create the organisation to fill out more information if needed:
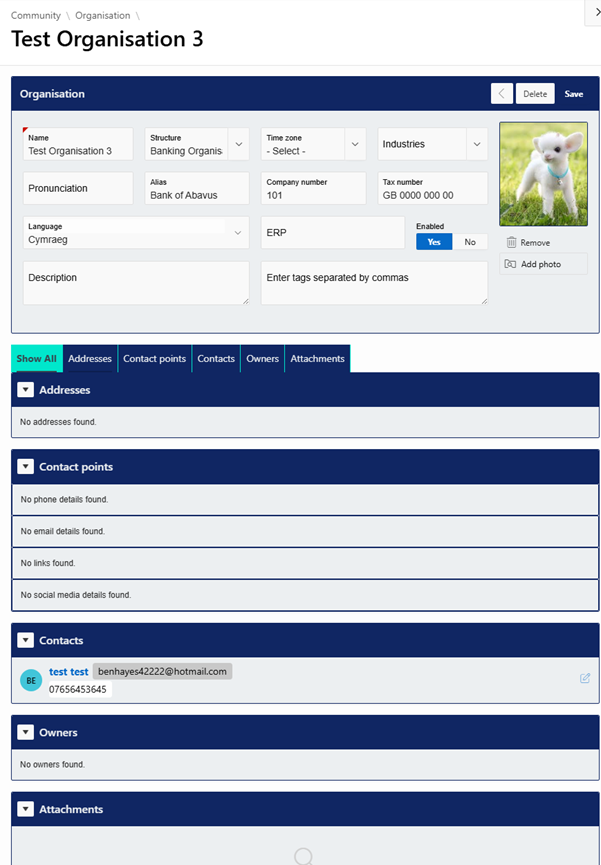
Structure – Organisational structure can be configured here, such as Non-Profit Organisation, Banking, Charity etc.
Time Zone – Time Zones can be configured for international organisations.
Industries – The organisation’s industry can be configured here, such as Agricultural, Sewerage and more.
Alias – A shorter name for the organisation can be recorded if needed.
Company Number – This is the number provided by Company’s House or the Companies Registration Office (for Irish Organisations).
Tax Number (VAT Number) – This is given by HMRC or ORC and supports both UK tax numbers.
Language – The organisation’s language can be configured to provide more information to help CSA’s correspond appropriately.
ERP – This code maps to the internal finance system.
Description – A description of the organisation and it’s duties can be added.
‘Add’ Side Menu
When editing an Organisation from the Administration portal, you can add the following:
Attachments – Documents, such as licenses, can be added to the Organisation.
Address – The address attributed to an organisation can be added if required, such as an office or headquarters.
Contact – A contact (person) can be added to the organisation. When adding, you can configure the type of relationship the person has to the organisation:
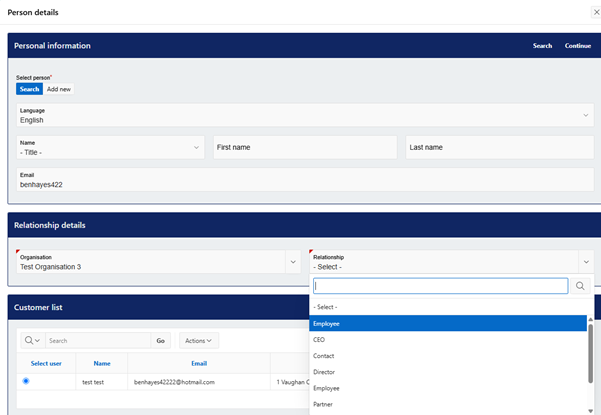
This will reflect on the customer’s profile, as well as list the person as a contact on the organisation.
Contact Point – Here, a contact point can be added, including phone numbers, email addresses, URLs and social media handles.
Owner – You can configure a user account to be the owner of the organisation, along with their role, configurable via Administration > Organisation > Role.
Contacts
When contacts have been configured against an organisation, click the edit button to assign access to what the person can see in the customer portal:
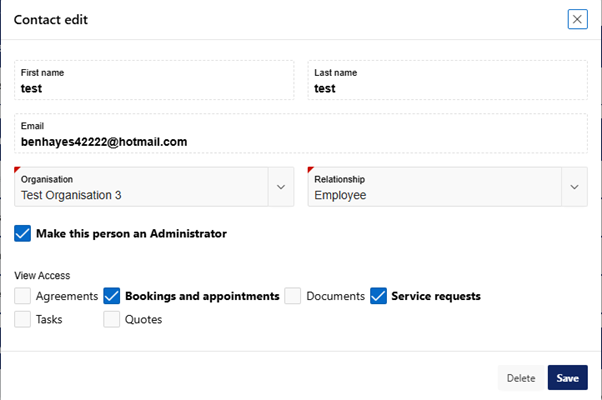
Make this person an Administrator – If ticked, the person will become an Organisation Administrator, allowing them to edit details via Menu > My Account > Organisations > View.
View Access – Here, you can tick what aspects of the organisation the contact can view. For example, if another contact was to submit a service request, the below contact would be able to view it via Menu > My Account > Organisations > View.
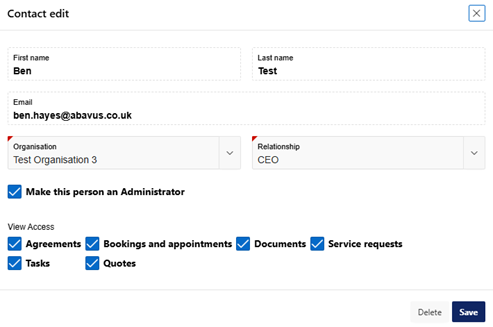
The same applies for agreements, bookings and appointments, documents, tasks and quotes, depending upon configuration.
Organisation Importing
Importing Organisations in MCS
If many organisations need to be imported at once, this can be done via the Import feature.
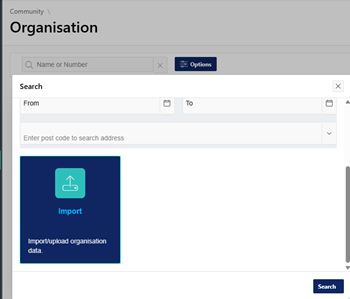
To start importing, go to Community > Organisation > Options (scroll down) > Import
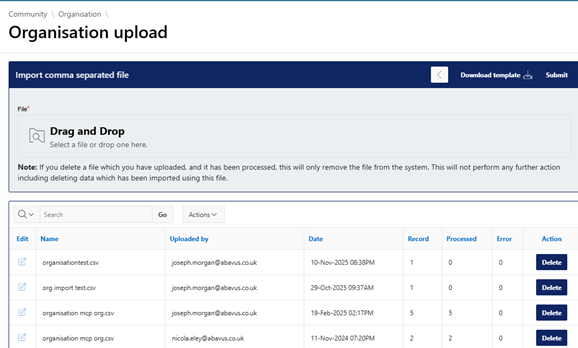
You will be met with the below page. Click on ‘Download Template’ to download a .csv template file.
The following values will be available for configuration:
ORGANISATION_NAME
COMPANY_NUMBER
TAX_REGISTRATION_NUMBER
USER_TITLE
USER_FIRST_NAME
USER_LAST_NAME
USER_MOBILE_NUMBER
USER_HOME_NUMBER
USER_ADDRESS
USER_ADDRESS2
USER_CITY
USER_STATE
USER_PINCODE
USER_COUNTRY
RELATIONSHIP
ORGANISATION_UPRN
Fill out these values and drag the file into the ‘Drag and Drop’ area shown in the above image. You can also click on this area and select the file.
Then, click on ‘submit’ to submit the file. The organisation data will be processed overnight.
Was this article helpful?
That’s Great!
Thank you for your feedback
Sorry! We couldn't be helpful
Thank you for your feedback
Feedback sent
We appreciate your effort and will try to fix the article