Introduction
About this guide
This document has been written to provide a comprehensive guide on scheduling repeat tasks. This includes the setup, management and task uploading.
Scheduling Repeating Tasks
About Scheduled Tasks
Administrators can schedule tasks on a weekly, monthly, or yearly basis, with options to select specific days or dates. Features include the ability to configure start and stop dates and manage exception days for skipped or alternate scheduling.
Configuring Repeat Task Schedules
To begin with configuration, go to the Tasks Module. Then, click on Options, selecting ‘Repeat’.
Click on the ‘Add’ button to add a new task.
Tick the ‘Schedule’ check box and a new region for schedule will appear (as shown below).
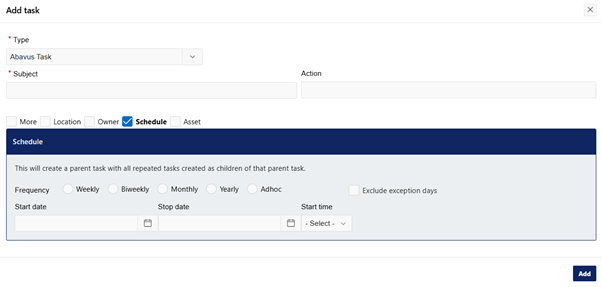
You can manage the frequency of repeat tasks on a weekly, biweekly, monthly, yearly or custom (adhoc) basis as needed.
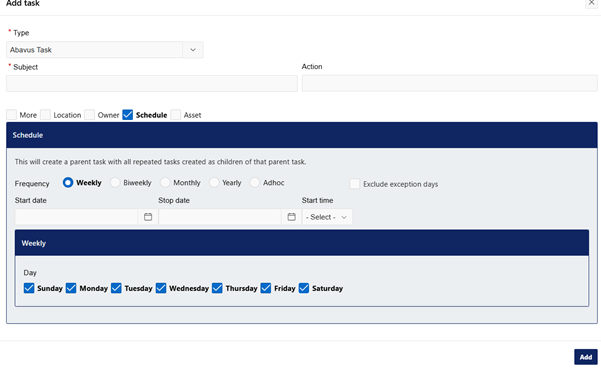
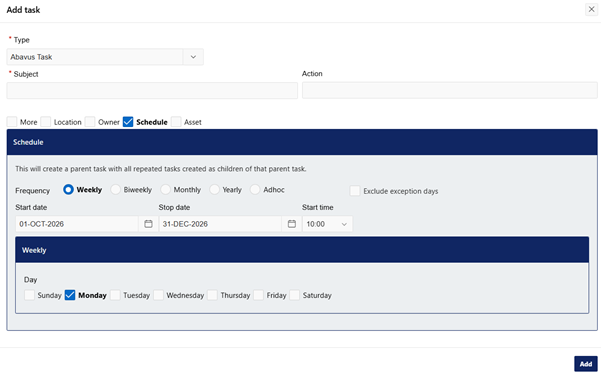
Weekly - You can select any number of days from Sunday, Monday, Tuesday, Wednesday, Thursday, Friday and/or Saturday for a weekly schedule:
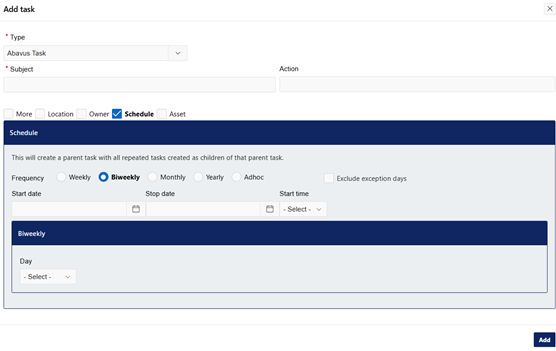
Biweekly – Tasks will be created every two weeks from the start date.
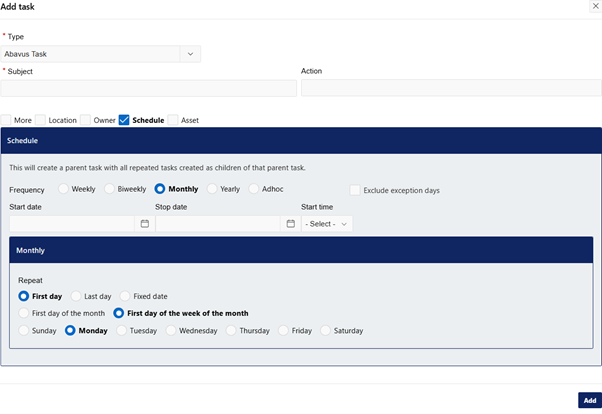
Monthly - Three options are available for a monthly schedule of any repeating task:
1.) The Administrator can select ‘First day of the month’ such as 1st Jan, 1st Feb, 1st March etc. or ‘First day of the week of the month’ for example first Sunday, Monday, Tuesday or Wednesday etc.
2.) Last day - Last day of the calendar month.
3.) Fixed date - Select any fixed date of the month.
Note: If the selected date does not exist in the following calendar month, it will be skipped automatically. For example, the 31st will be skipped in months with 30 days or less, and the next recurring task will be scheduled for the following month.
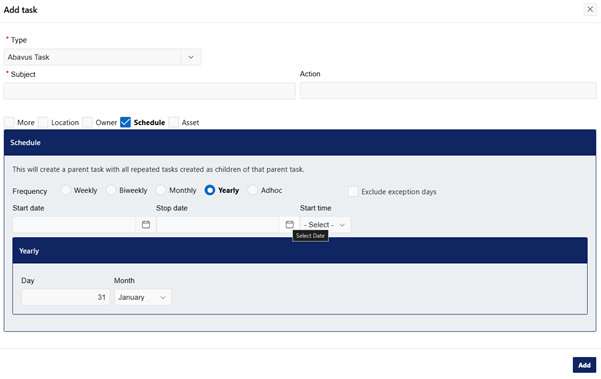
Yearly – Select a day and month for the task to be repeated on a particular day of the year:
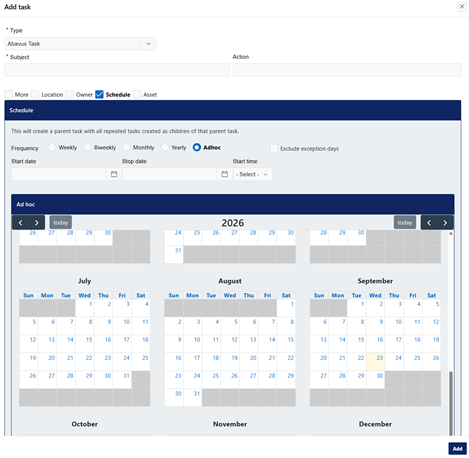
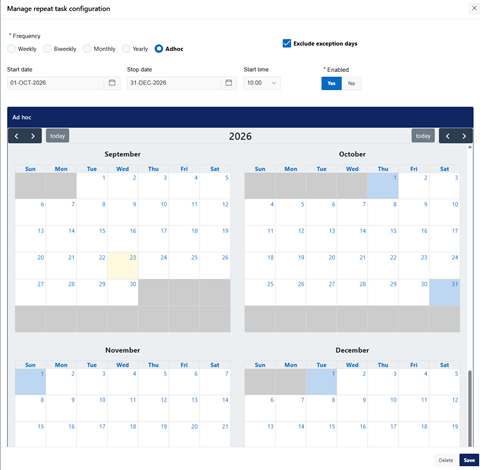
Adhoc – Selecting this option opens a calendar menu, in which you can select exactly what days the task is scheduled for. Dates in the past cannot be selected.
In all these instances, you can configure Start date, stop date and Start time for a repeat task.
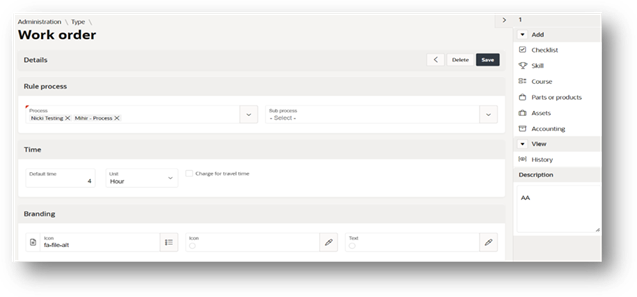
 The stop time can be configured via the Task Type. You can update this time for any task by going to Administration > Task > Type, selecting the task type, and
then updating the default time in the Time region:
You can also choose to Exclude exception days by ticking the checkbox against it.

Note - To run, the repeat task scheduler must be setup at least the week before in order for the repeat tasks to generate.
Exception Days
About Exception Days
In some cased, it may be beneficial to skip or choose an alternate day for tasks. For example, if a task falls on Christmas day, and work cannot be completed on that day, an alternative day can be automatically selected.
Configuring exception days will, therefore, allow administrators to manage the task schedule as needed.
Configuring Exception Days
To configure an exception day, go to Administration > General > Exceptions
Here, you can edit any existing exception or add a new exception by clicking on the ‘Add’ button.
Exception Days can be based upon the following:
Bin Type – This will allow you to make exceptions for certain collection types.
Round Number – This allows for exceptions to be made based upon waste rounds.
Task Type – Exceptions can be made from Task Types, such as Flytipping.
Next, you can select the type of exception day you want to implement.
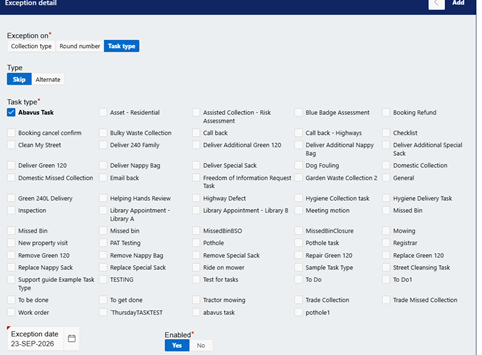
Skip - This will skip the task and not move it to an alternative date.
For example, in the below screenshot, all the tasks under selected task type will be skipped on the exception date.
Configure the exception day and click ‘add’ on the top right of the screen.
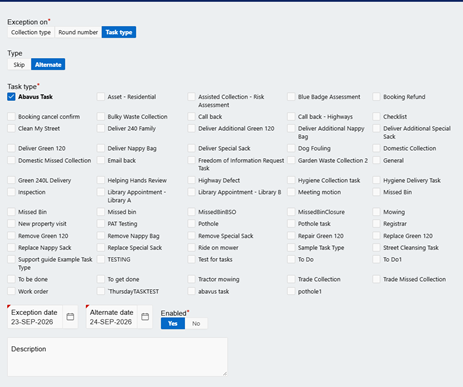
Alternate – If a task falls on this exception day, it will be moved to the configured ‘Alternate Date’. Input the exception date and alternate date for which the tasks are to be change, then click ‘Add’ at the top right of the page.
Viewing Repeat Task Details
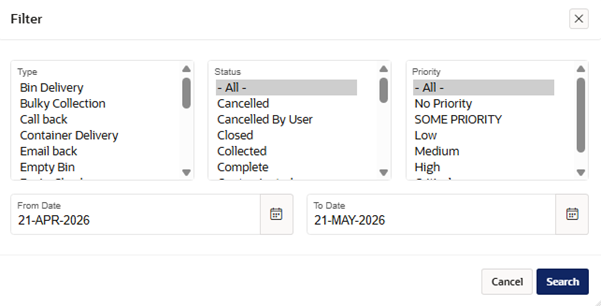
Firstly, go to Tasks > Options > Repeat > Options. The below filter menu will appear, where you can select the date range and search for repeat tasks as per Type, Status and Priority:
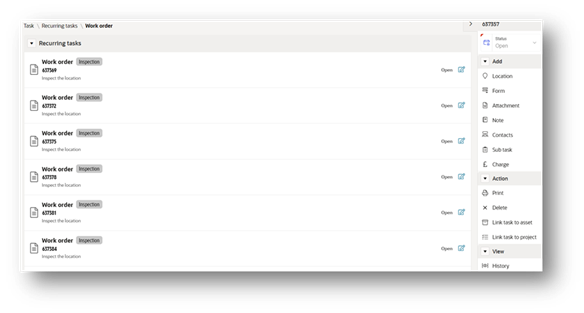
Next, edit any recurring task and navigate to ‘Recurring task’ region to view all the child repeat tasks created under the parent repeat task.
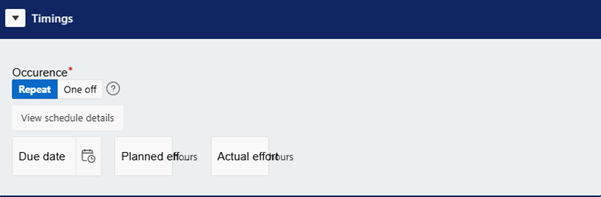
You can then proceed to the ‘Timings’ section and click on ‘View schedule details’ to view or update the previously selected schedule for repeat tasks.
Please note that, once the repeat task has been created, the Subject, Action, Description, Location and other details will remain identical in all child tasks.
Uploading Repeat Tasks
About Repeat Task Uploading
Users can upload repeat tasks in bulk by using a formatted CSV template. This
allows the system to generate tasks in advance, providing a buffer for administrators to review and change if required.
About the Uploading Process
To upload repeat tasks, go to Tasks > Options > Import-Repeat
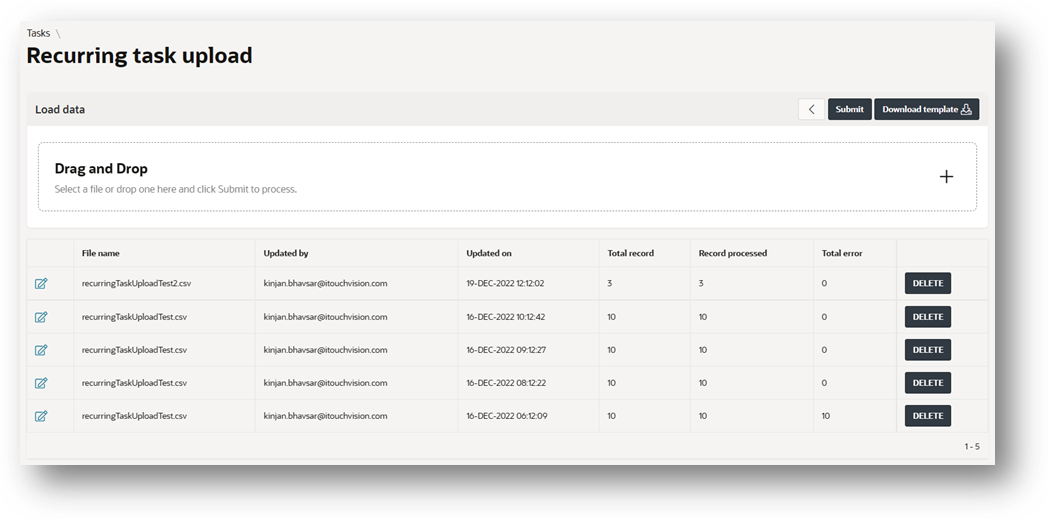
Then, fill the details of the tasks in a CSV file as per the sample data available. Once this has been done, upload the file and click on the ‘Submit’ button to upload the tasks in bulk.
Please follow the formatting of the sample data to avoid errors.
If the data is formatted incorrectly, errors will show up next to that task’s column under the ‘total error’ column. If errors are encountered, you must update upload the erroneous bulk tasks again.
To avoid duplication, ensure that you are not uploading the already submitted tasks which have successfully uploaded.
The scheduler will run on nightly basis to generate the tasks.
All repeating tasks will be created 7 days in advance. For example, on the 1st of January, repeat tasks for the 8th of January will be created, allowing time for editing if needed.
Was this article helpful?
That’s Great!
Thank you for your feedback
Sorry! We couldn't be helpful
Thank you for your feedback
Feedback sent
We appreciate your effort and will try to fix the article