Introduction
About the module
The Bereavement Services module supports councils in managing cemeteries and bereavement services with care and efficiency.
It enables users to record and organise data, manage bookings, and gain insights through reporting — helping teams maintain transparency, accuracy, and compassion throughout the process.
Who should use this guide?
This guide is intended for users responsible for setting up and using the Bereavement Services module, including administrators who configure related settings and staff who manage bereavement records day to day.
The purpose of this document is to inform users about our commitment to accessibility and the measures we take to ensure our platform is usable by as many people as possible, including those with disabilities.
Configuration
Statuses, Options, Types, and Groups
- Navigate to Administration → Bereavement to access configuration settings.

- Click Status to define the available record statuses.
- Use Add to create a new status, and Edit to update or delete existing ones.
- Use Status Transitions to define how records move between statuses, including initial and final states.
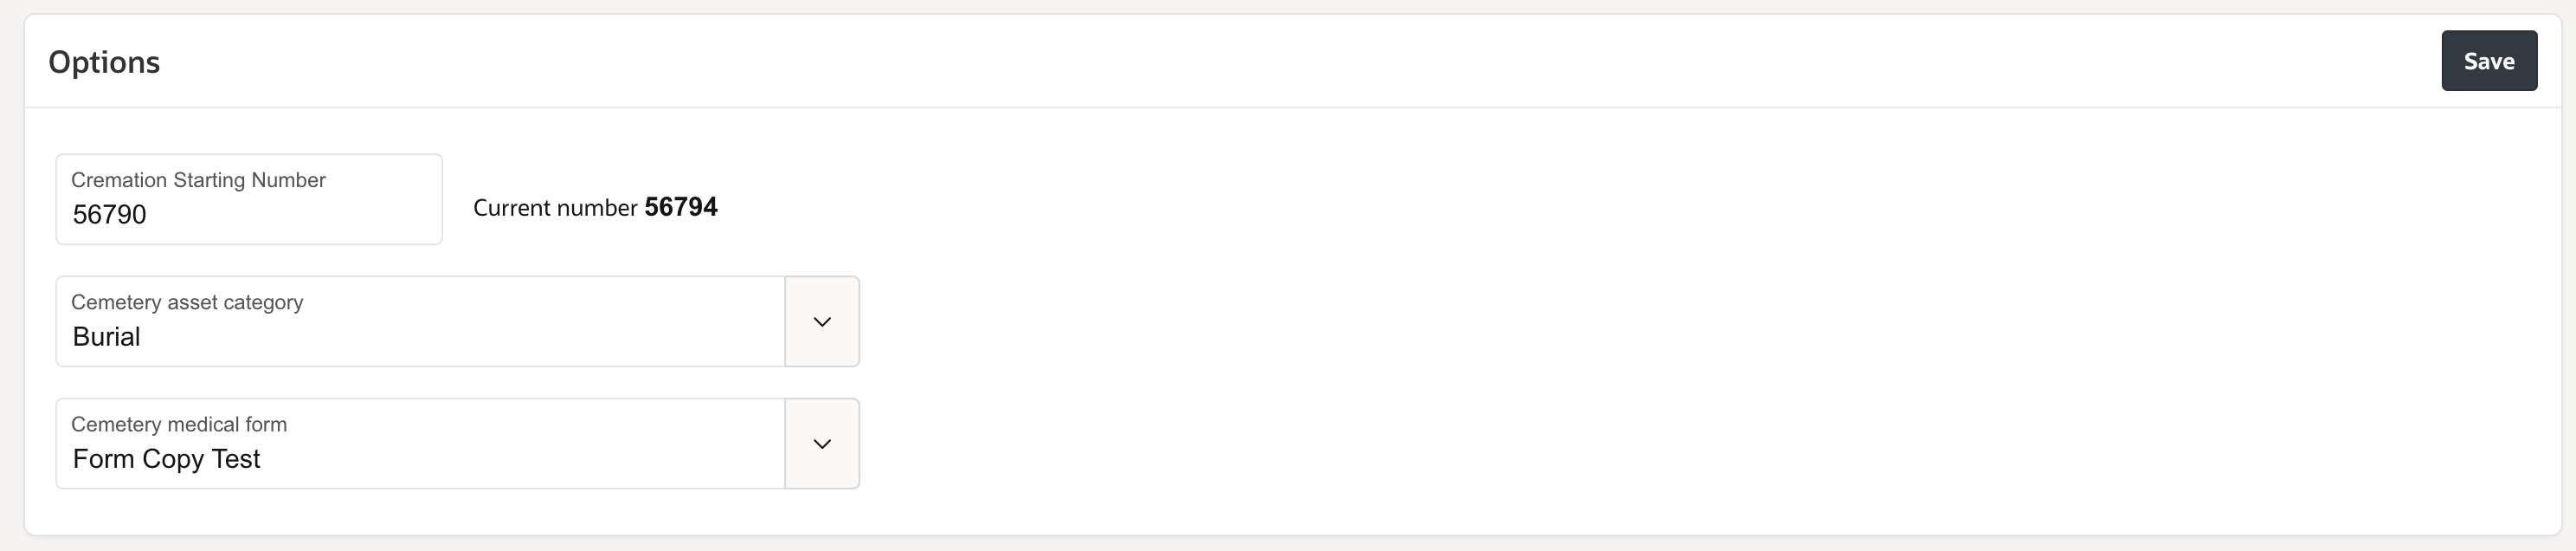
- Click Options to configure key module settings:
- Cremation starting number – defines the first cremation record number; new records will increment automatically.
- Cemetery asset category – selects the default asset category for new burial locations.
- Cemetery medical form – links to a pre-configured form sent to the medical referee.
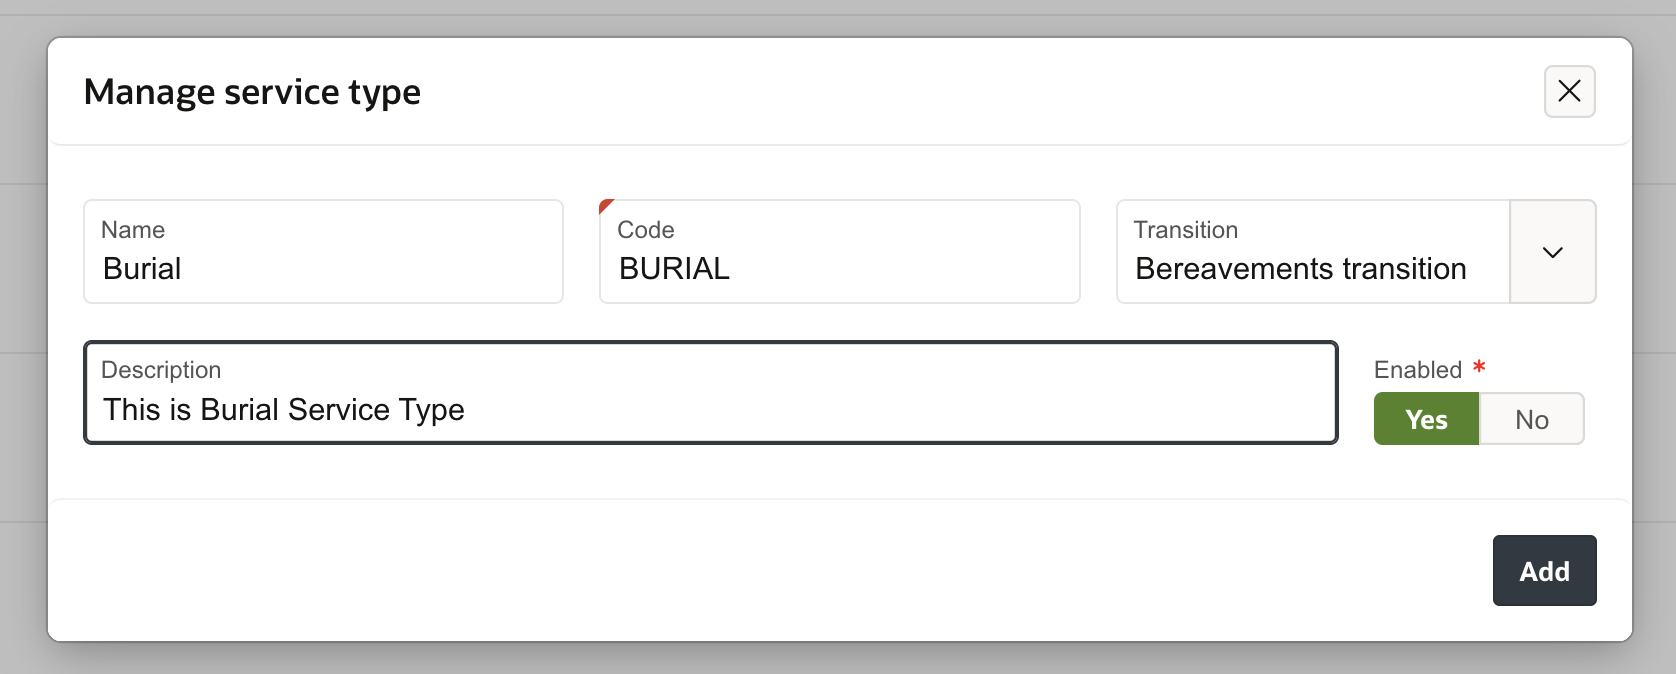
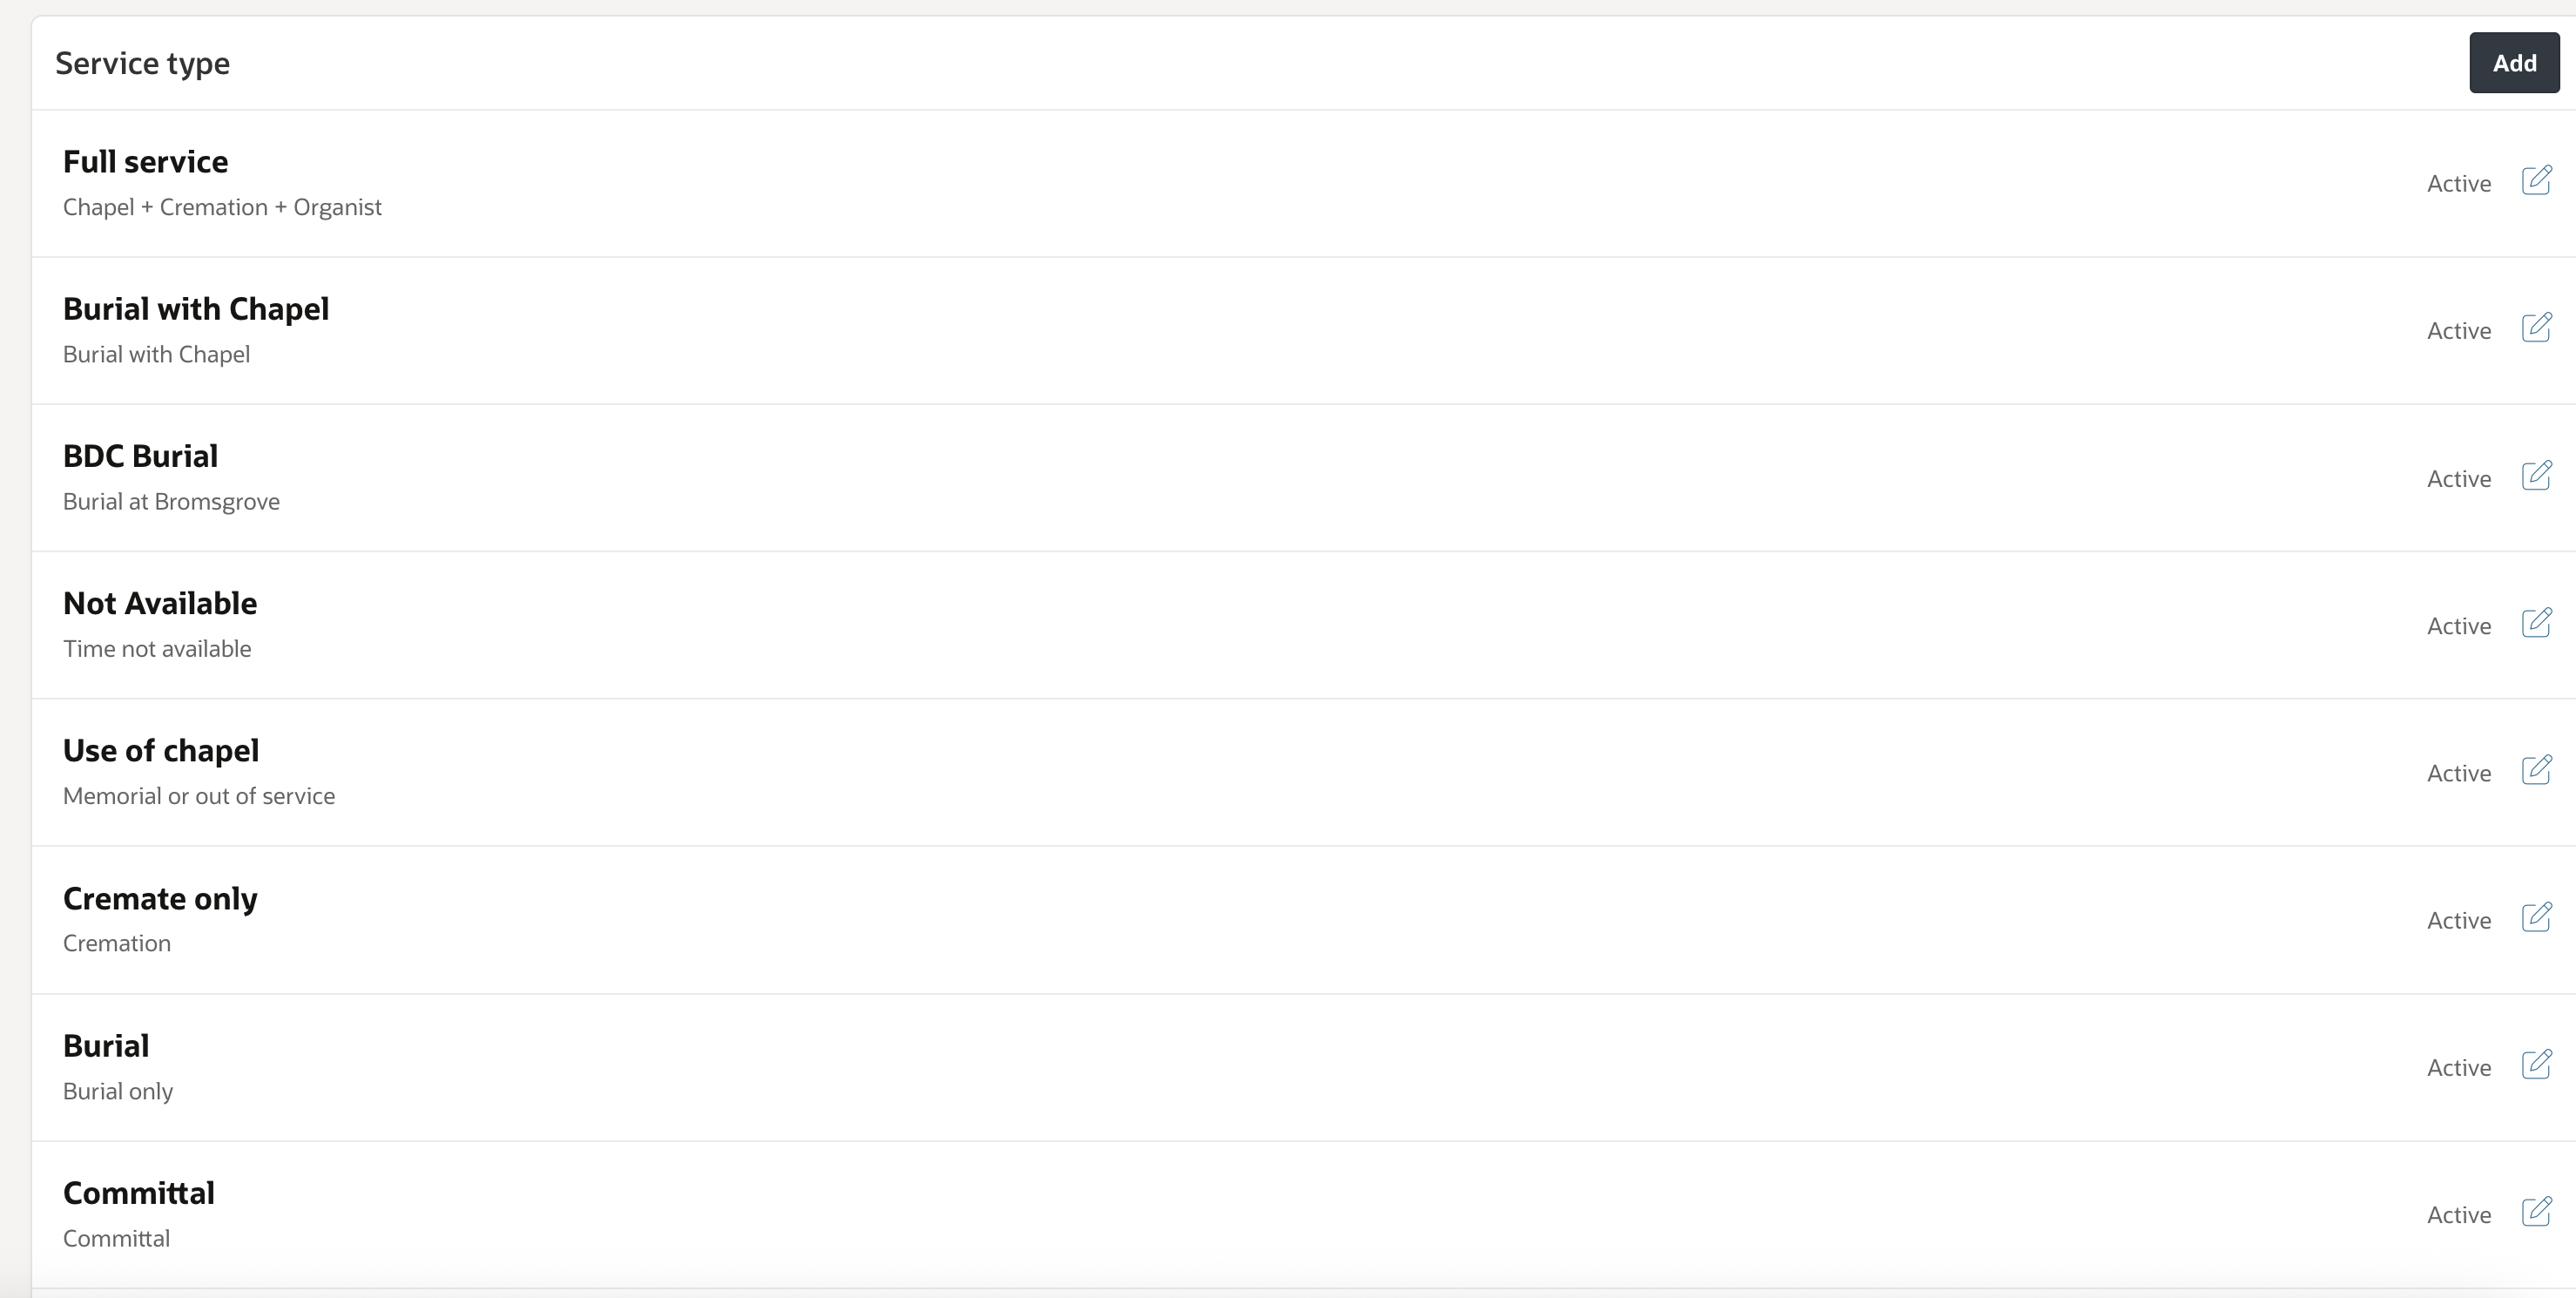
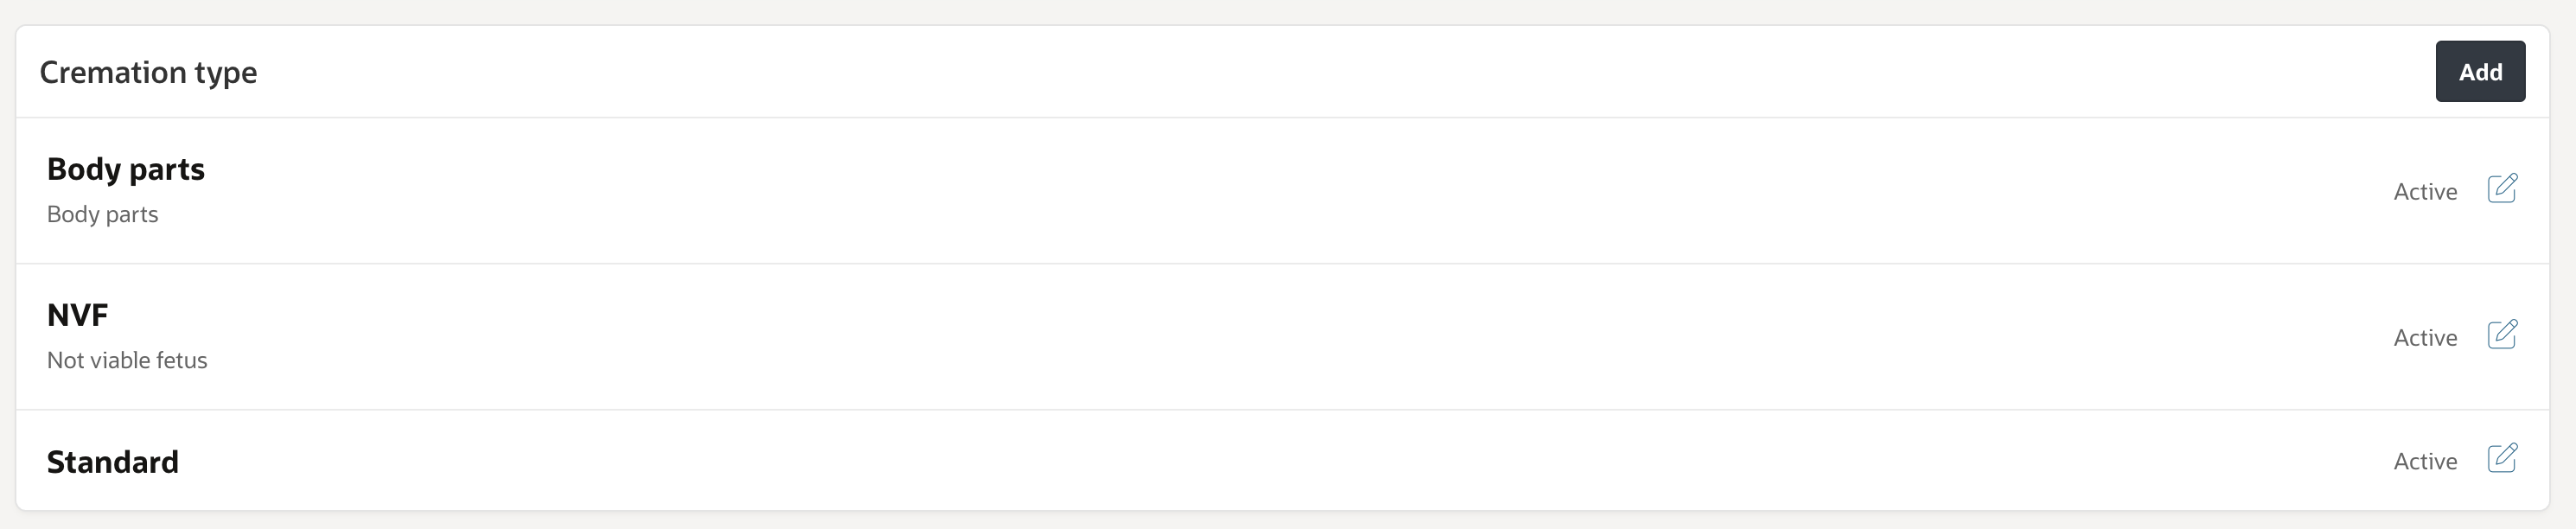
- Add service and cremation types:
- Service type – defines types of services (e.g., burial, cremation).
- Cremation type – defines cremation variations for booking and management.
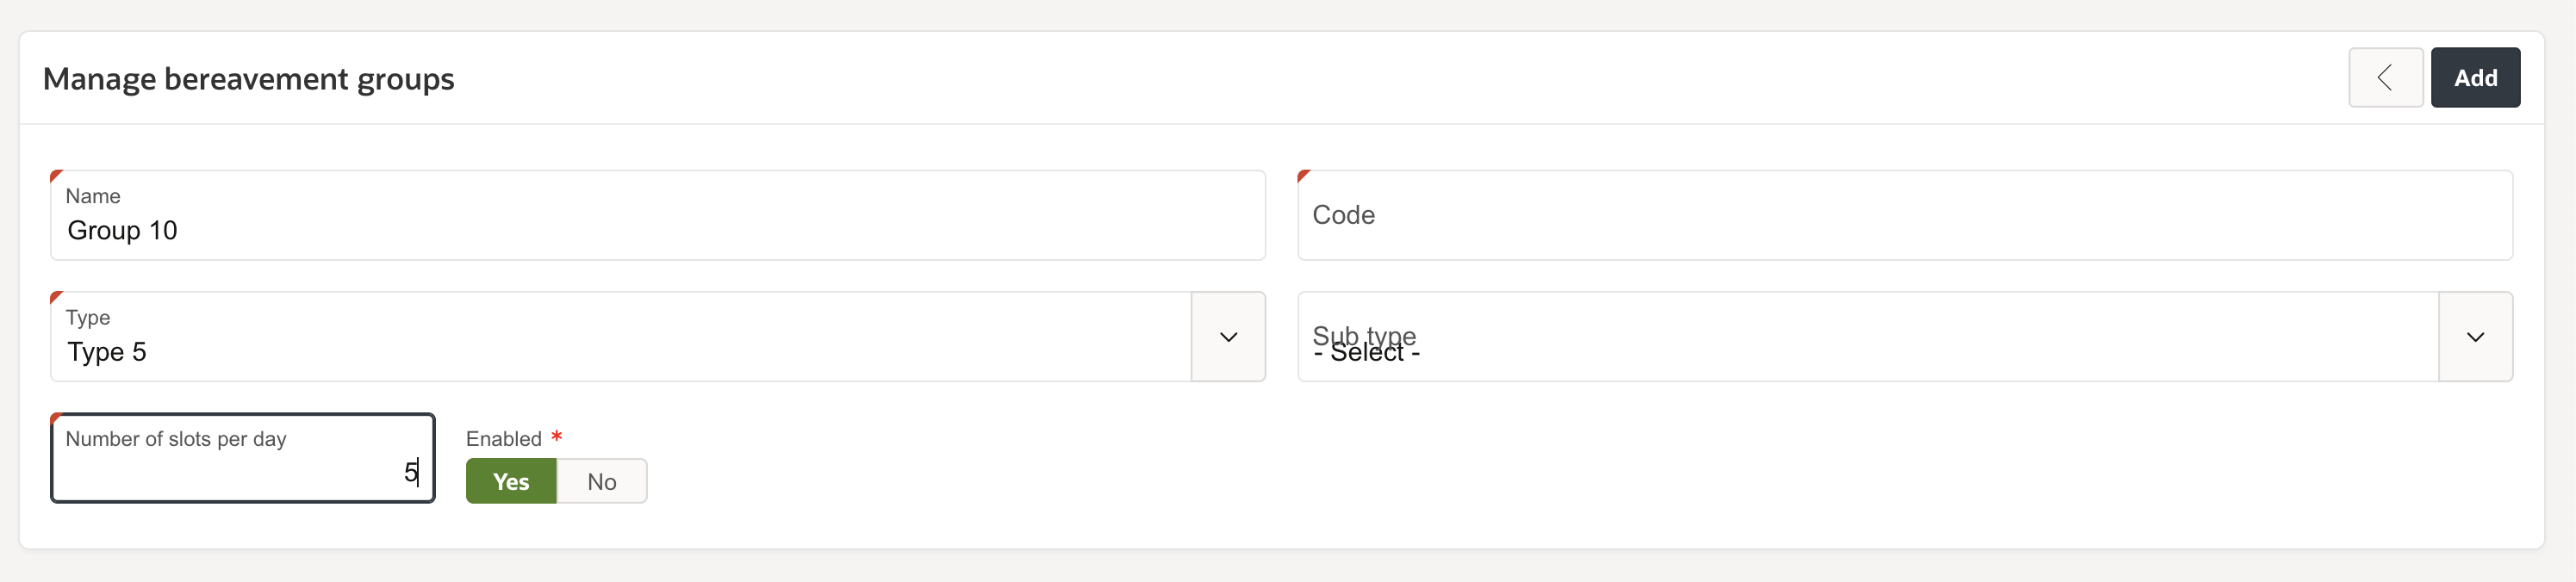
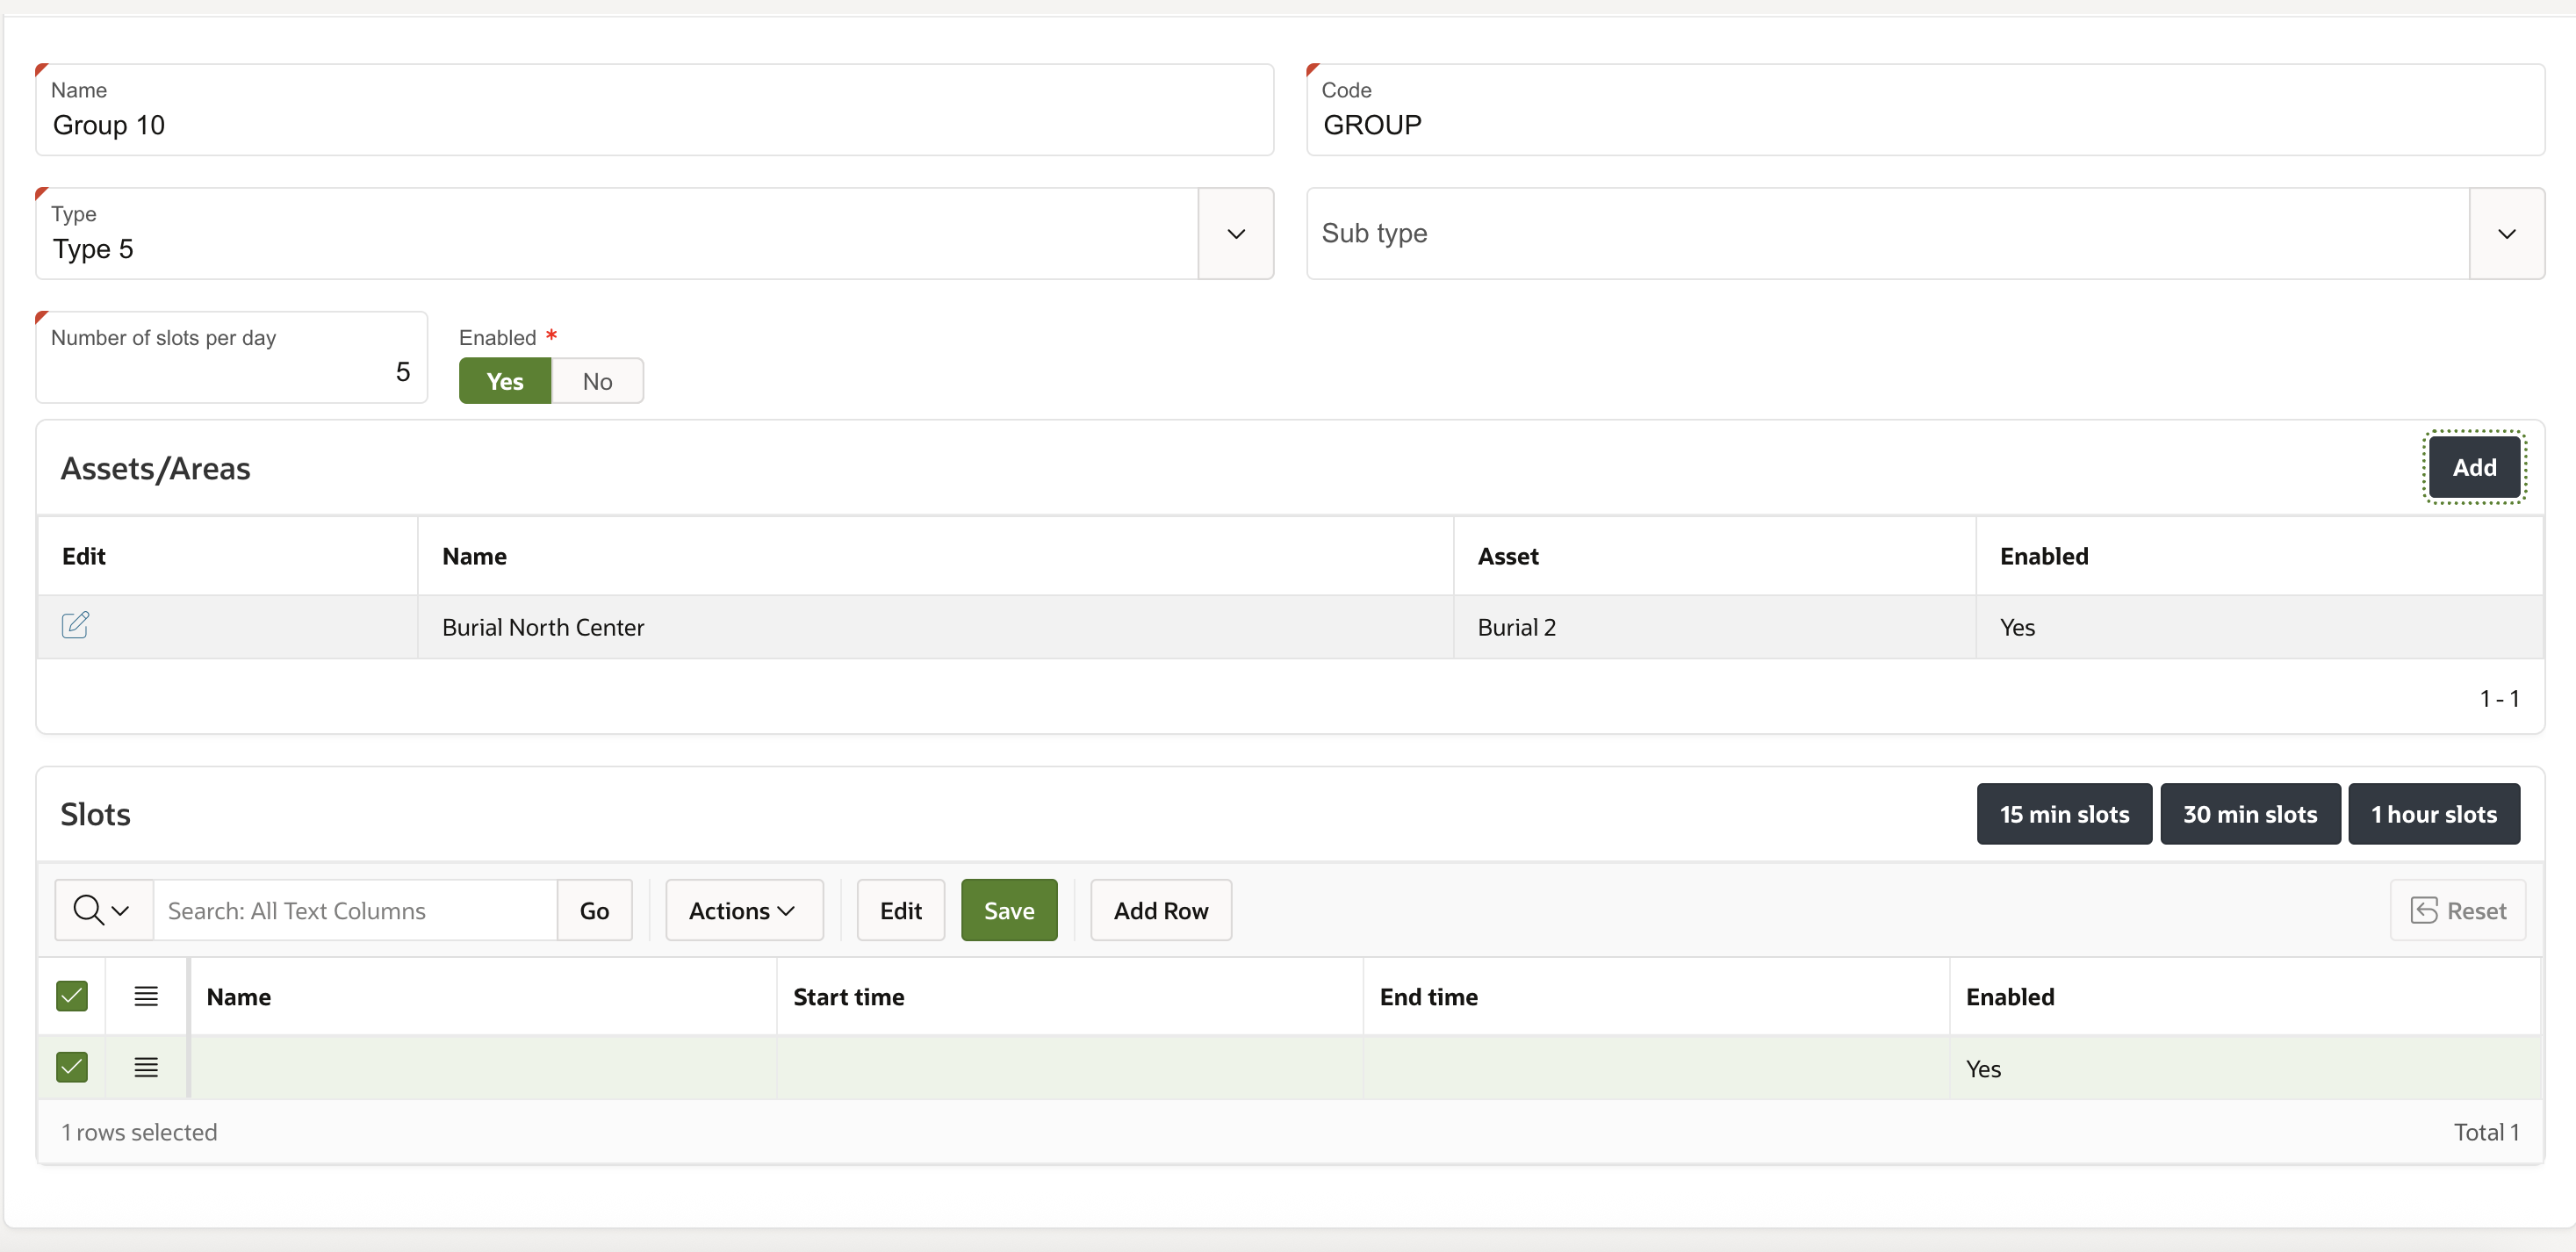
- Configure cemetery Types and Sub-types to support booking and slot management.
- Create Cremation Groups to assign staff and manage available service slots. Slots can be generated automatically in 15-minute, 30-minute, or 1-hour intervals, and adjusted as required.
- You can map assets directly to cremation groups from the group details page.
- Slots can be generated automatically in 15-minute, 30-minute, or 1-hour intervals and modified individually if needed.
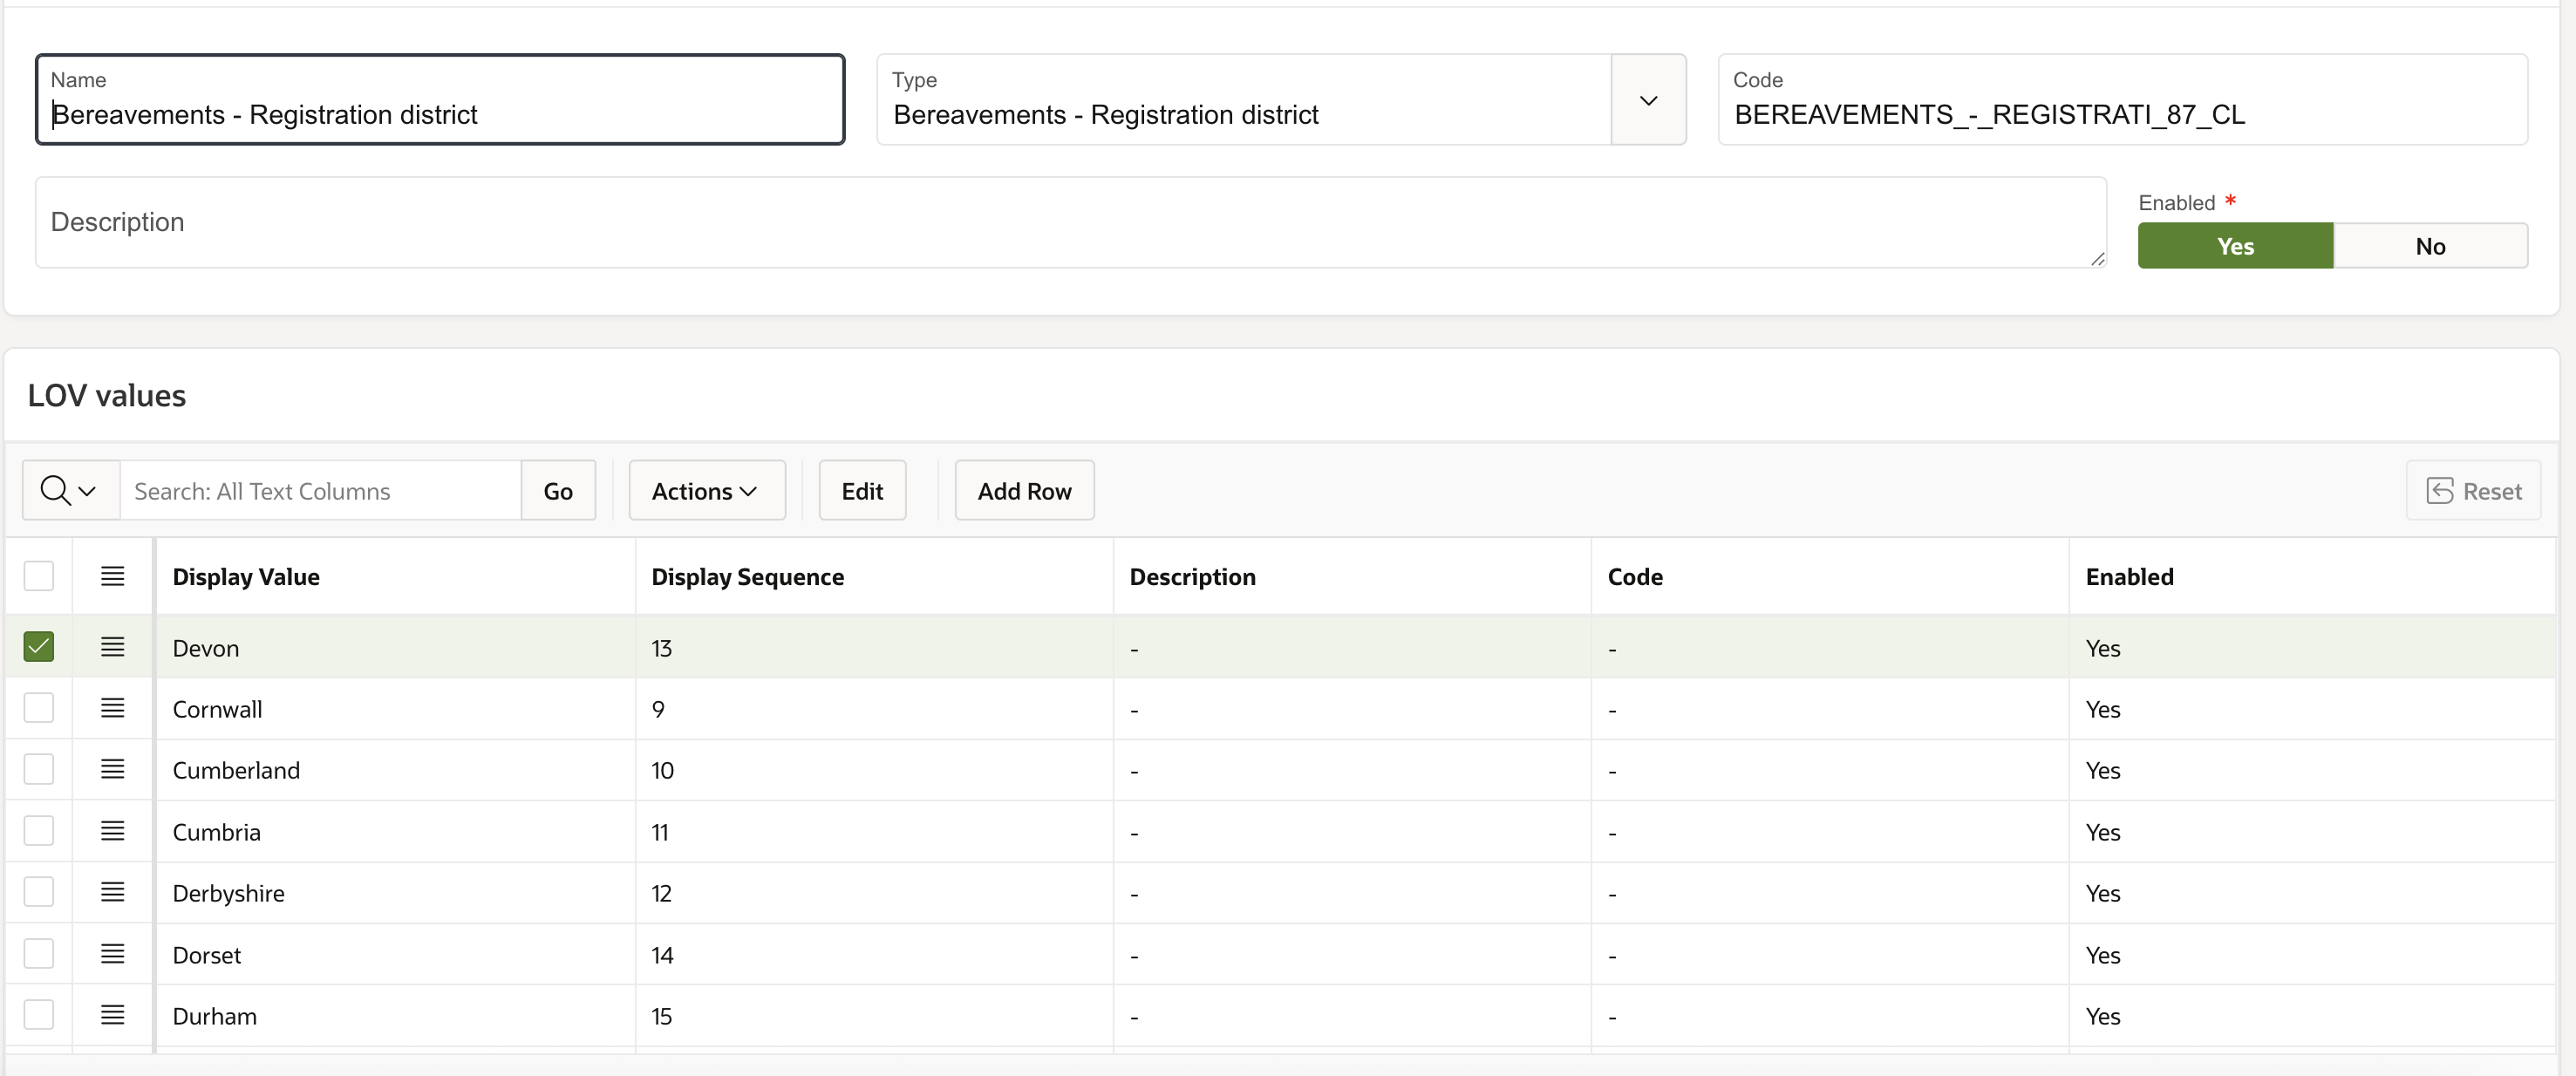
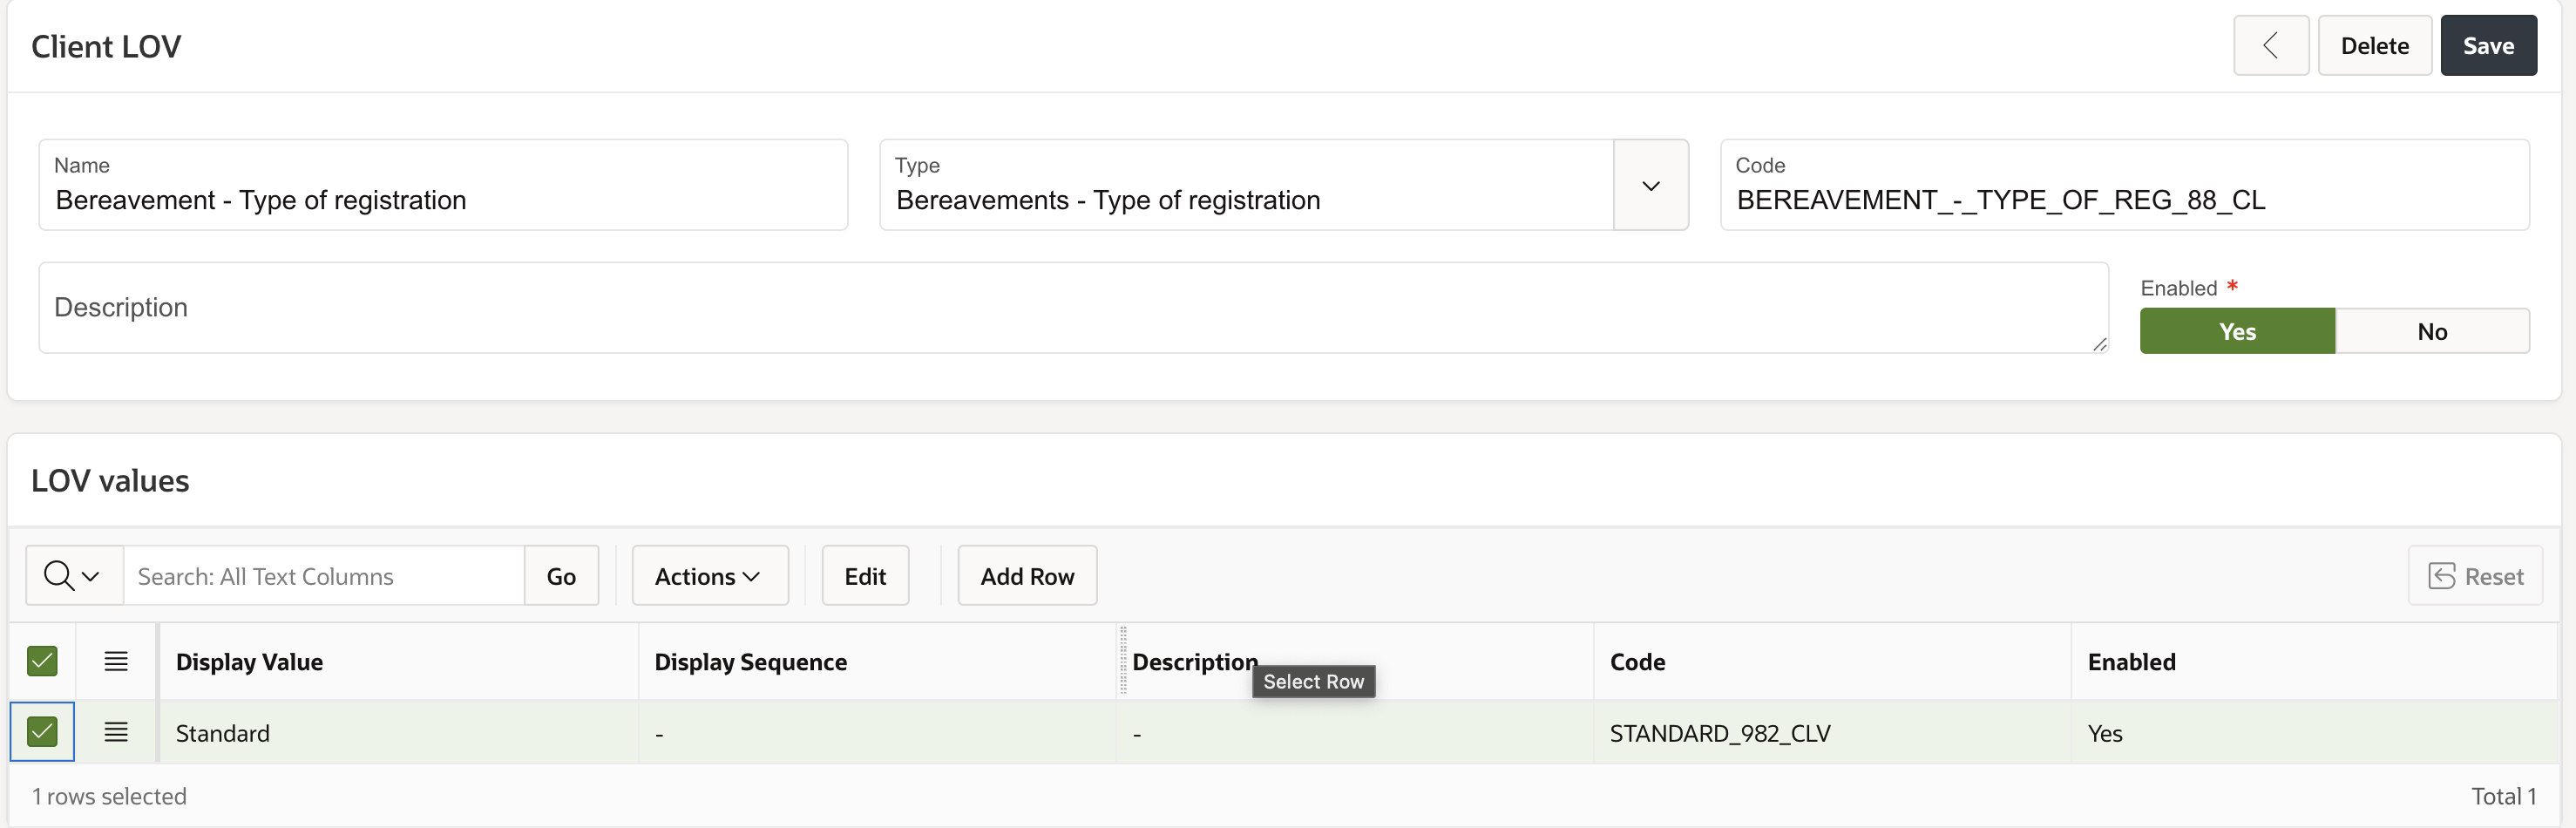
List of Values (LOVs)
Before creating records, add required LOVs under Administration → LOVs.

The required lists include:
- Bereavements – Registration district: identifies where the death is registered.
- Bereavements – Type of registration: specifies the registration type.
Using the module
Creating a bereavement record
- Navigate to the Bereavements tab in the Administration portal.
- Click Add to create a new record.
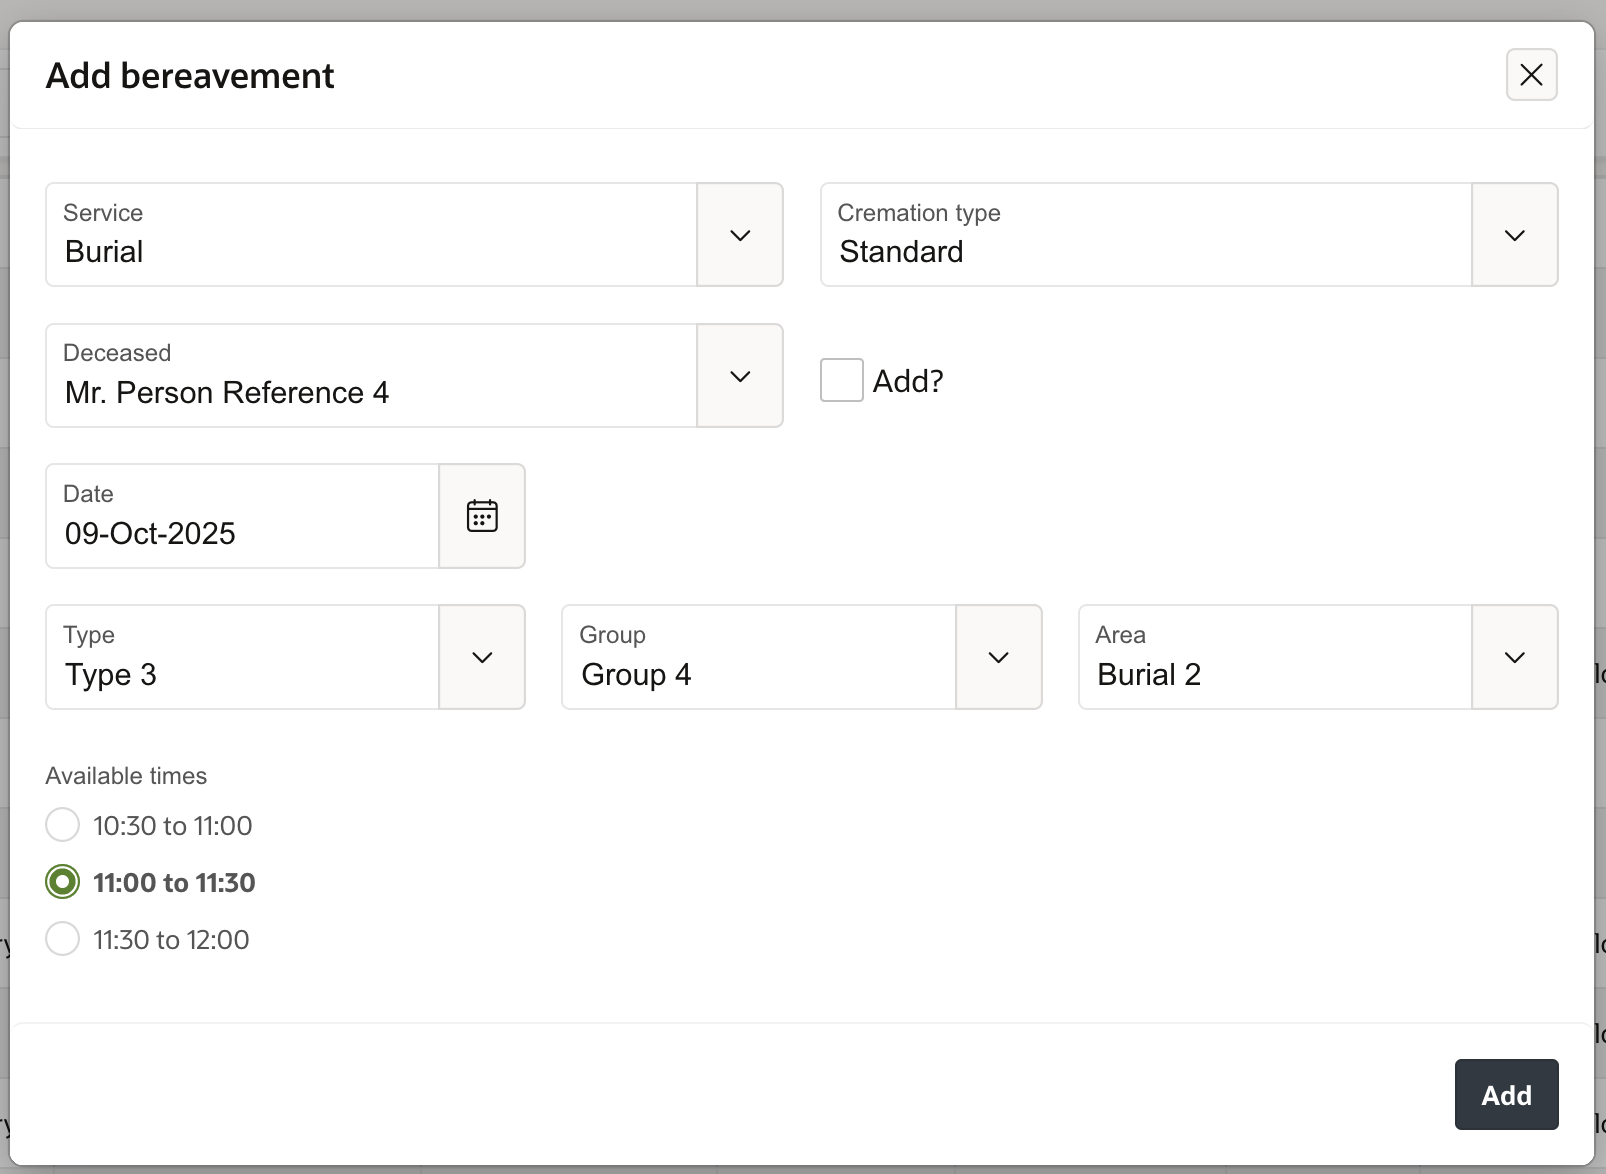
- Select the Service and Cremation Type from the configured lists.
- Choose the Deceased Person from the Community module, or create a new record if not available.
- Enter the Date of Burial and select the Type, Group, and Area to view available slots.
- Adjust the date or group if no slots are available.
Bereavement record details
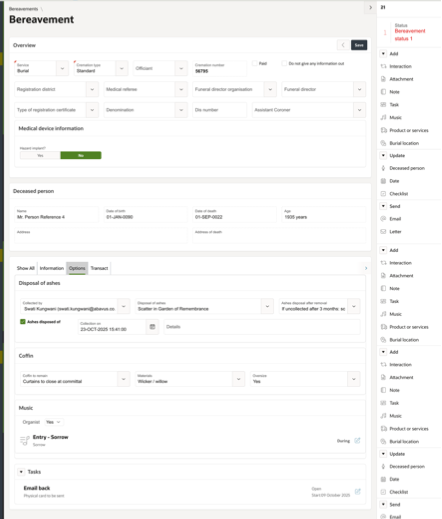
From the record details page, users can manage all related information:
- Overview region – View or update the service, cremation type, and assign users to roles such as Officiant, Medical Referee, Funeral Director, or Assistant Coroner.
- Registration district – Select from the preconfigured LOV list.
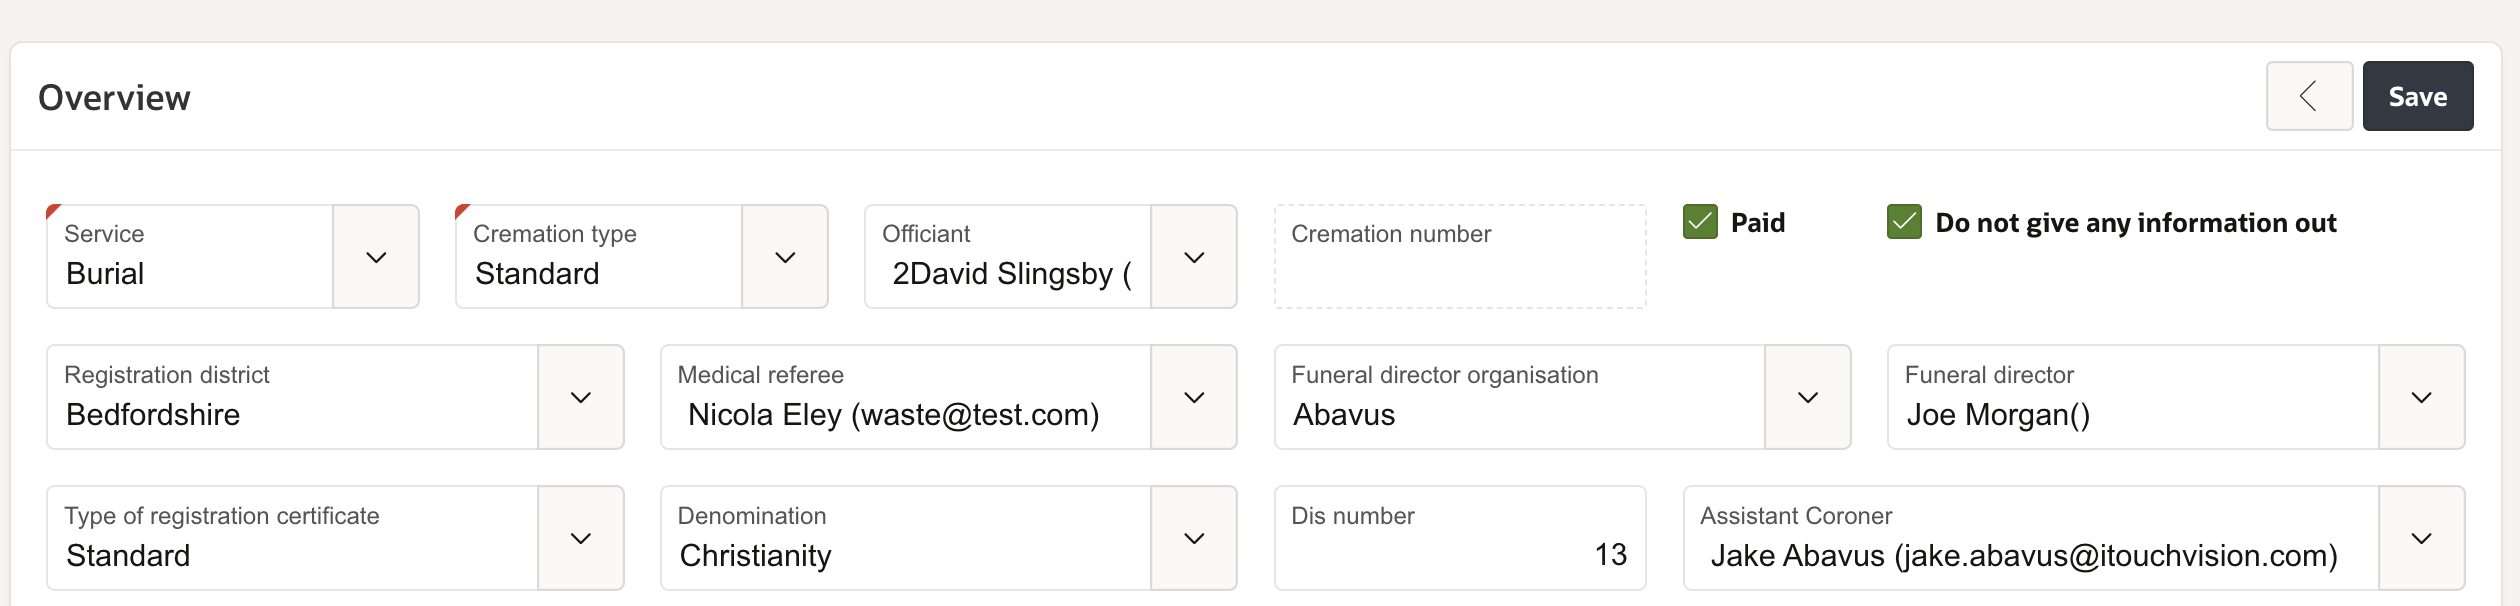
- Medical Device region – Record any implanted medical devices associated with the deceased.

Available actions
The right-side menu provides access to key functions for managing bereavement records.
Add
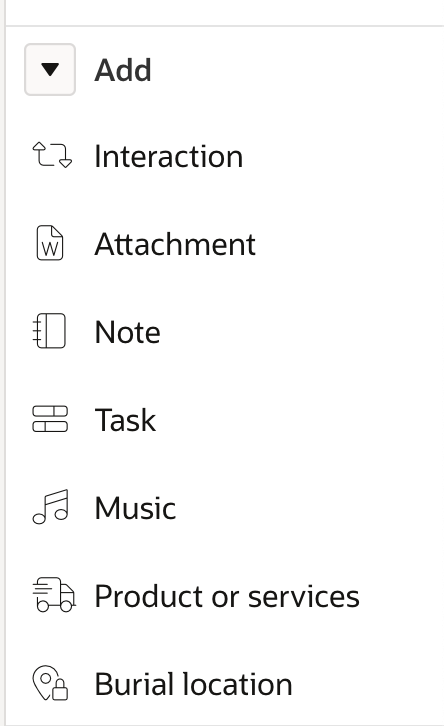
- Interaction – Log emails, SMS, letters, or calls.
- Attachment – Upload supporting documents.
- Task – Create and assign tasks.
- Note – Add internal or public notes.
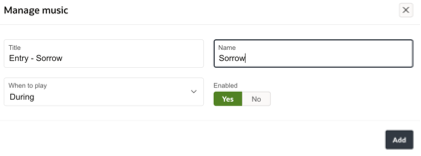
- Music – Record music details against the record.
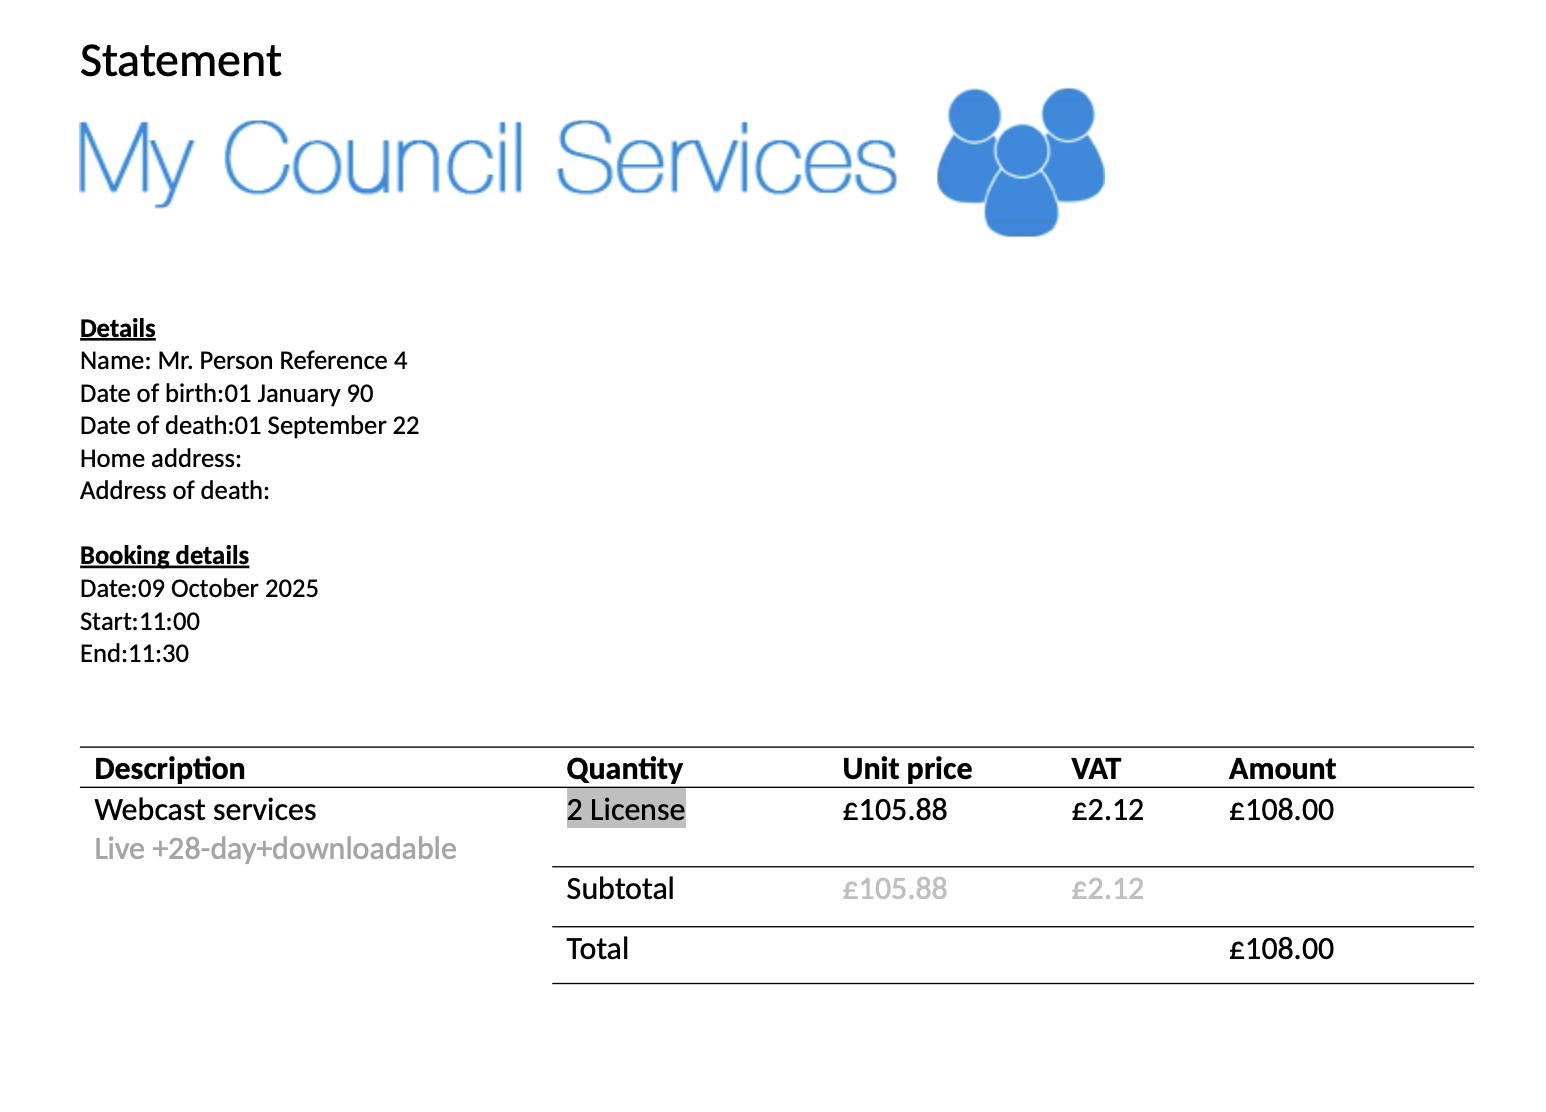
- Products or services – Add optional services such as webcasts, automatically applying associated costs.

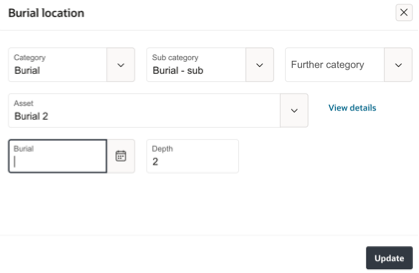
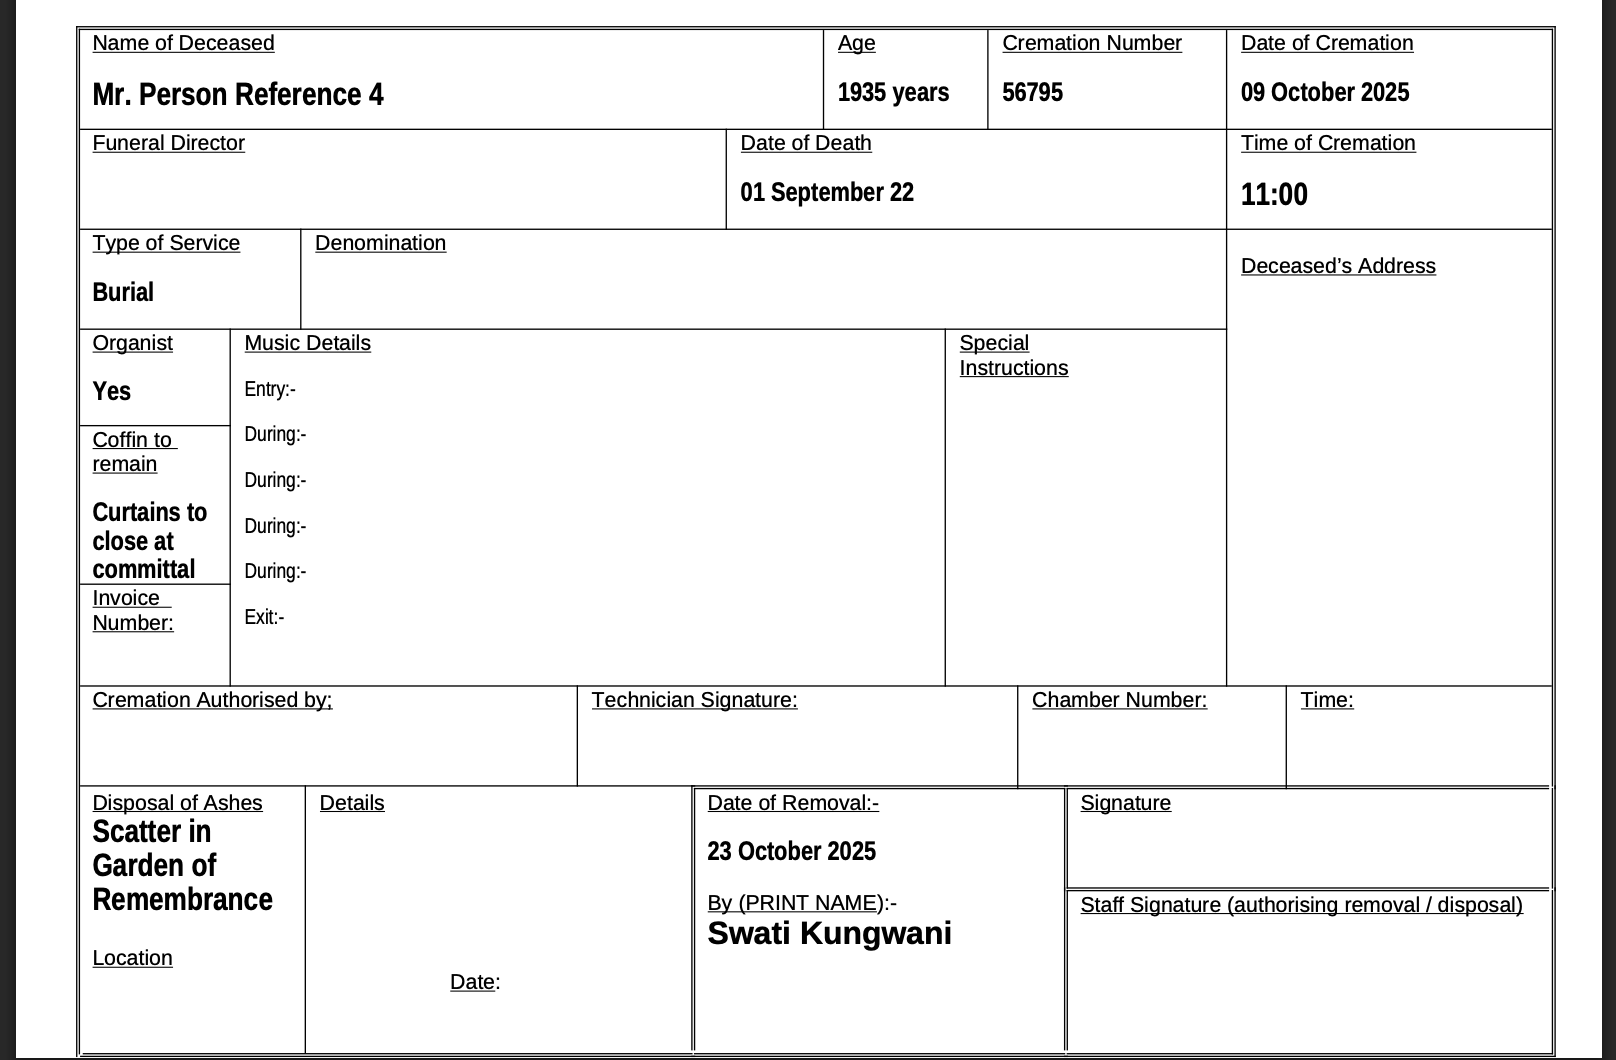
- Burial location – Update burial details, including depth.
Update
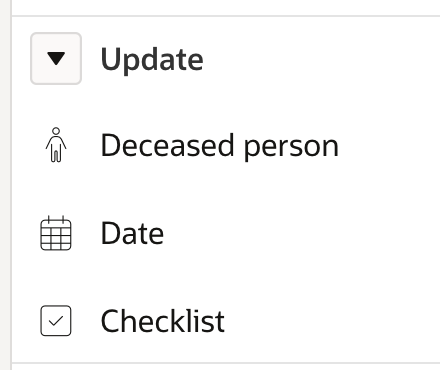
- Deceased person – Correct or change the linked record.
- Cremation number – Apply or unassign the next sequential cremation number.
- Date – Update the service date.
- Checklist – Modify associated checklist items.
Send
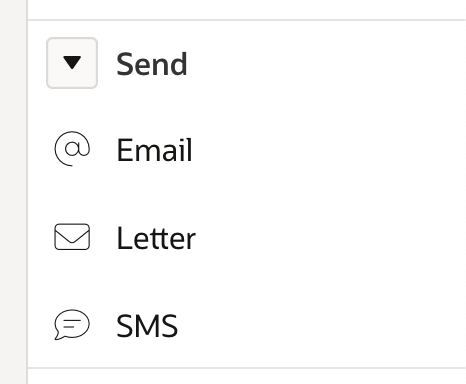
- Email, SMS, or Letter – Communicate with the funeral director or related contacts using free text or templates (configured under Administration → General → Email Templates).
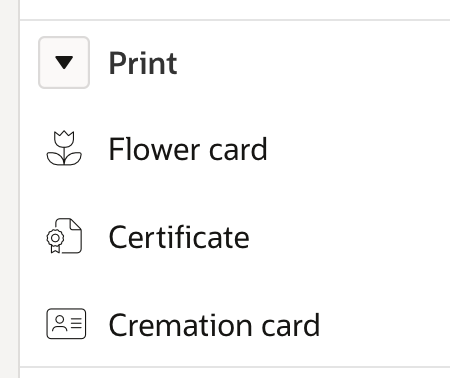
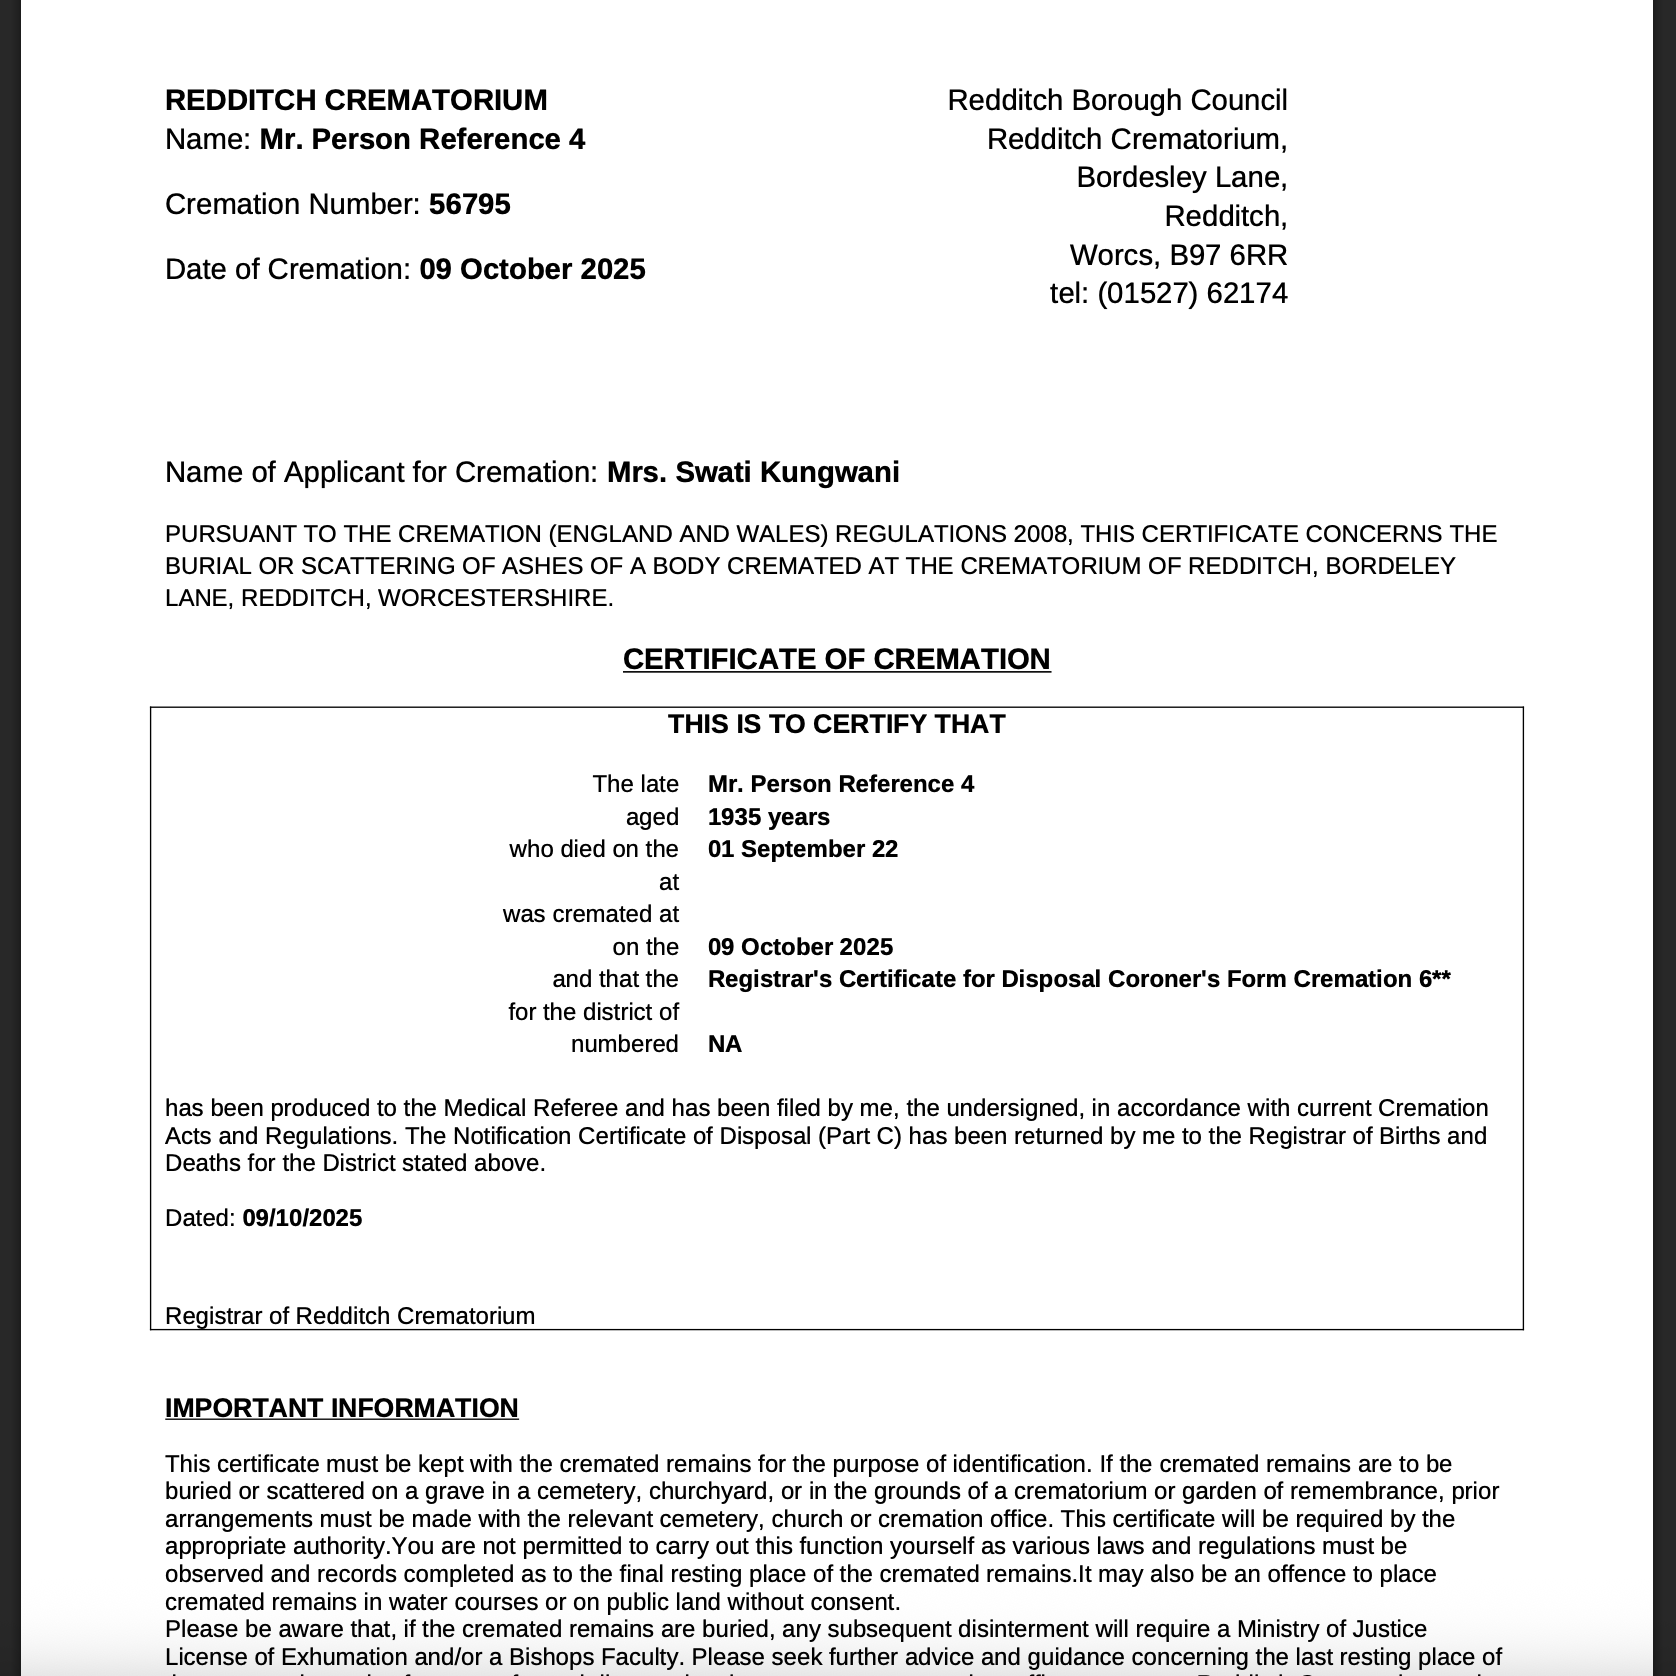
- Flower card, Certificate, or Cremation card – Generate printable PDF versions for records and documentation.

Action
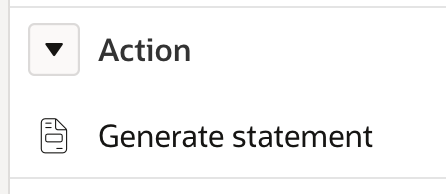
- Generate statement – Produce a PDF billing summary for all chargeable products and services.
View
- History – Display a timeline of all transactions and interactions.
Delete
- Bereavement – Permanently remove the record.
- Interaction – Delete one or more recorded interactions.
Additional options
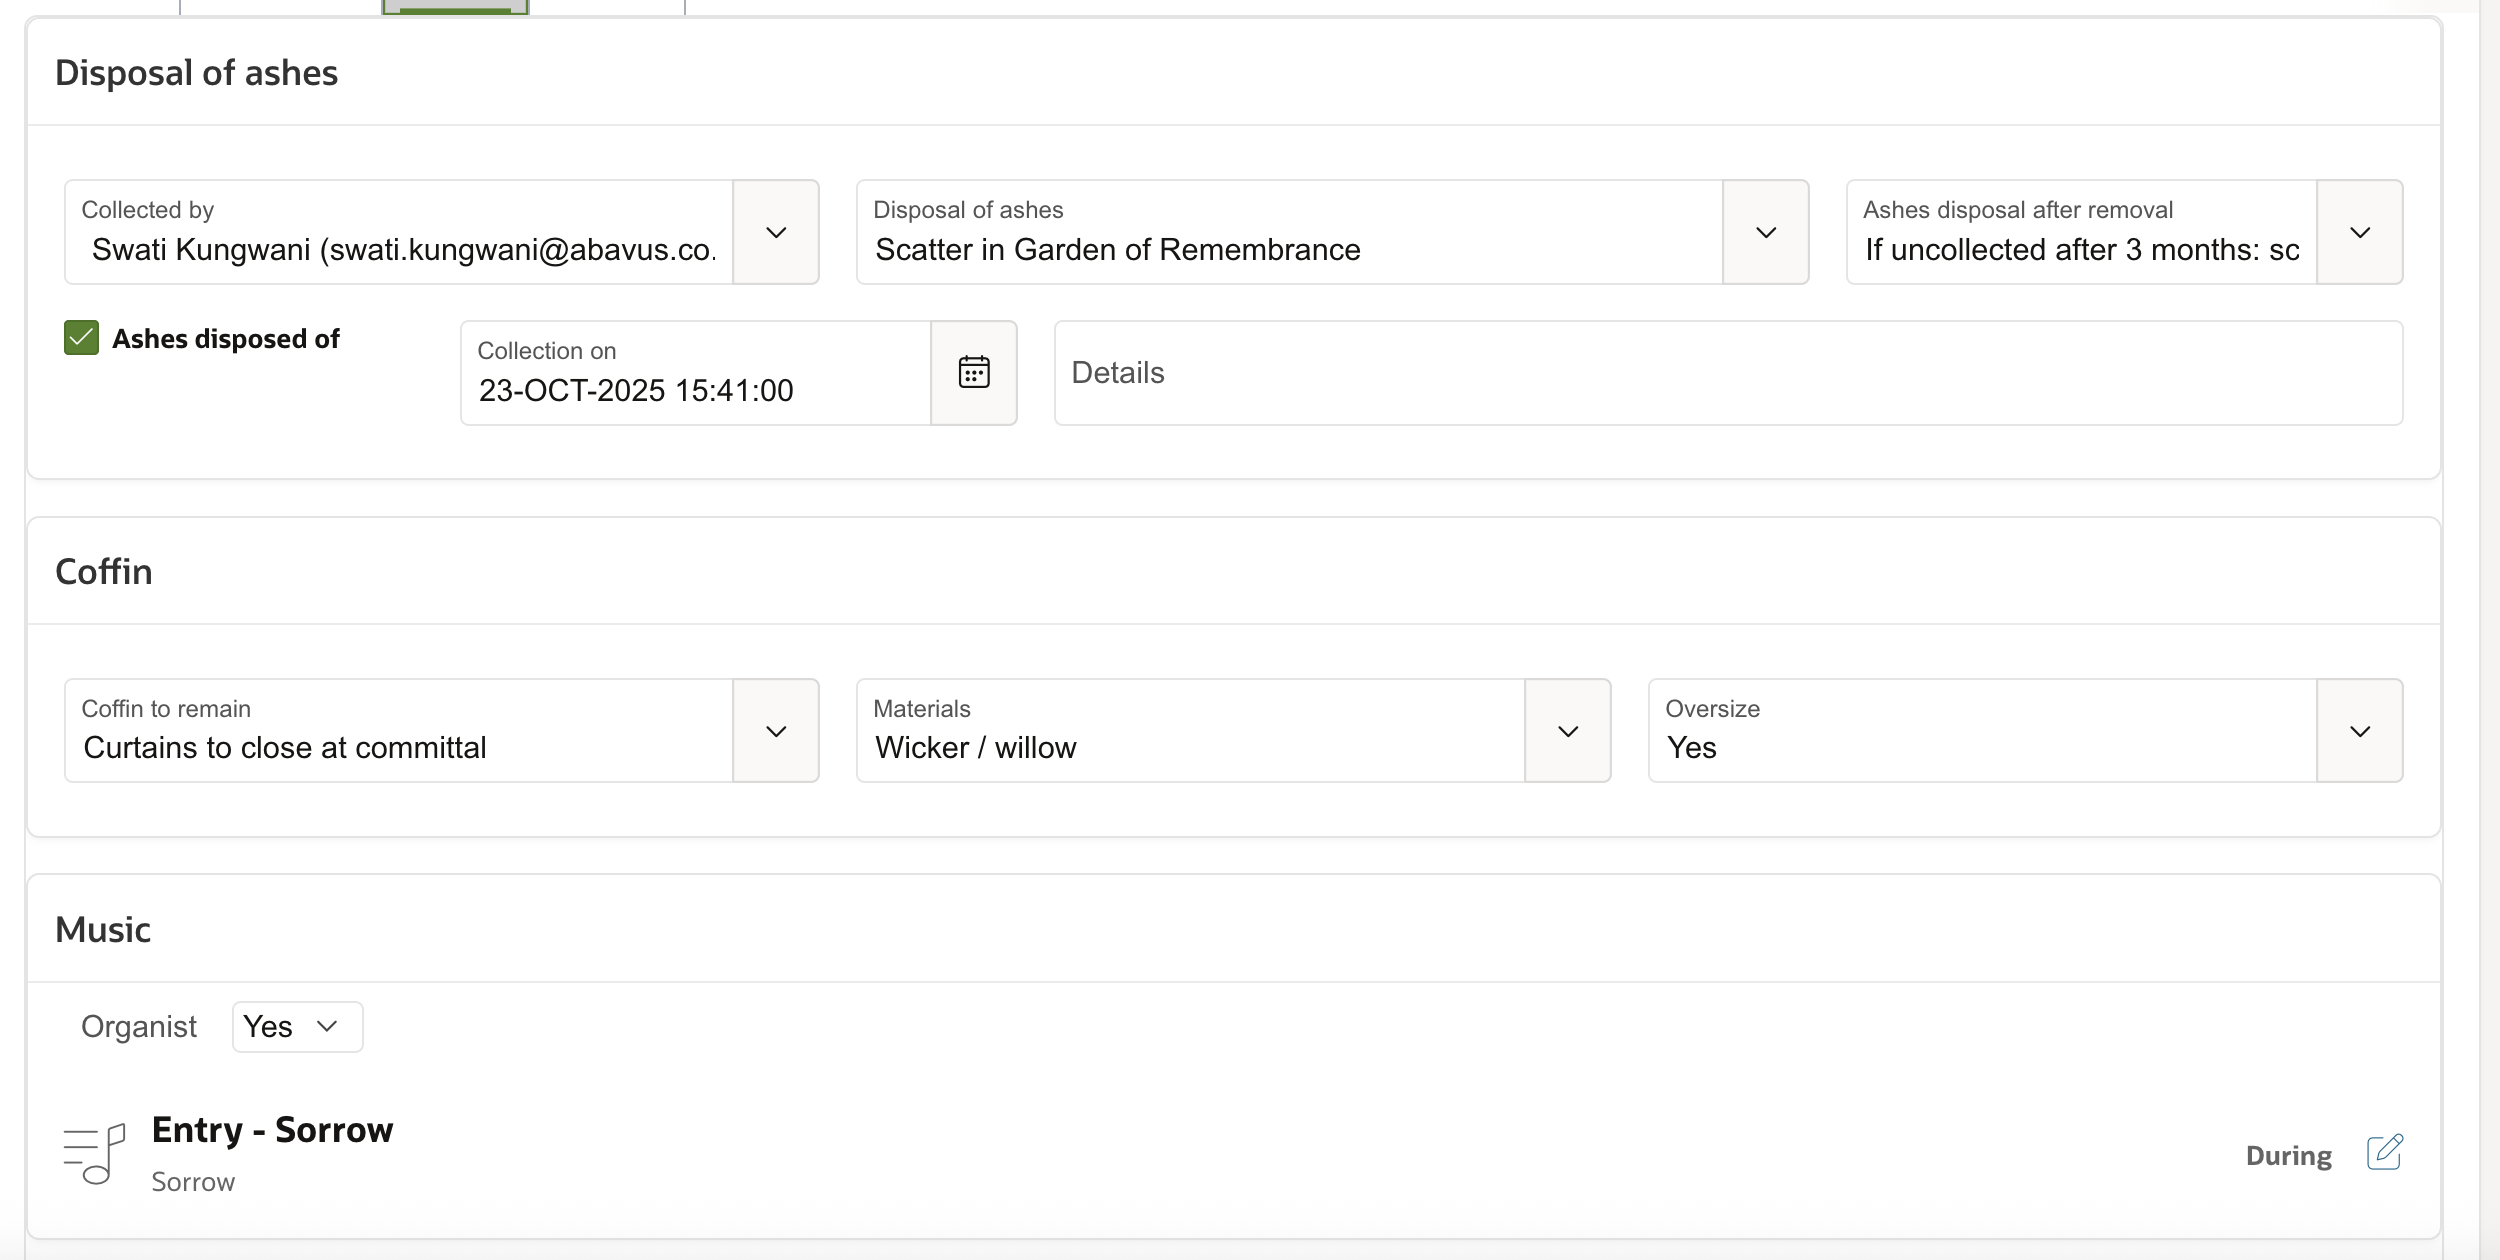
Under the Options tab on the bereavement record page, you can record supplementary information:
- Disposal of ashes – Capture collection and disposal details.
- Coffin – Record coffin type, material, and whether oversized.
- Music (Organist) – Indicate whether an organist is required.
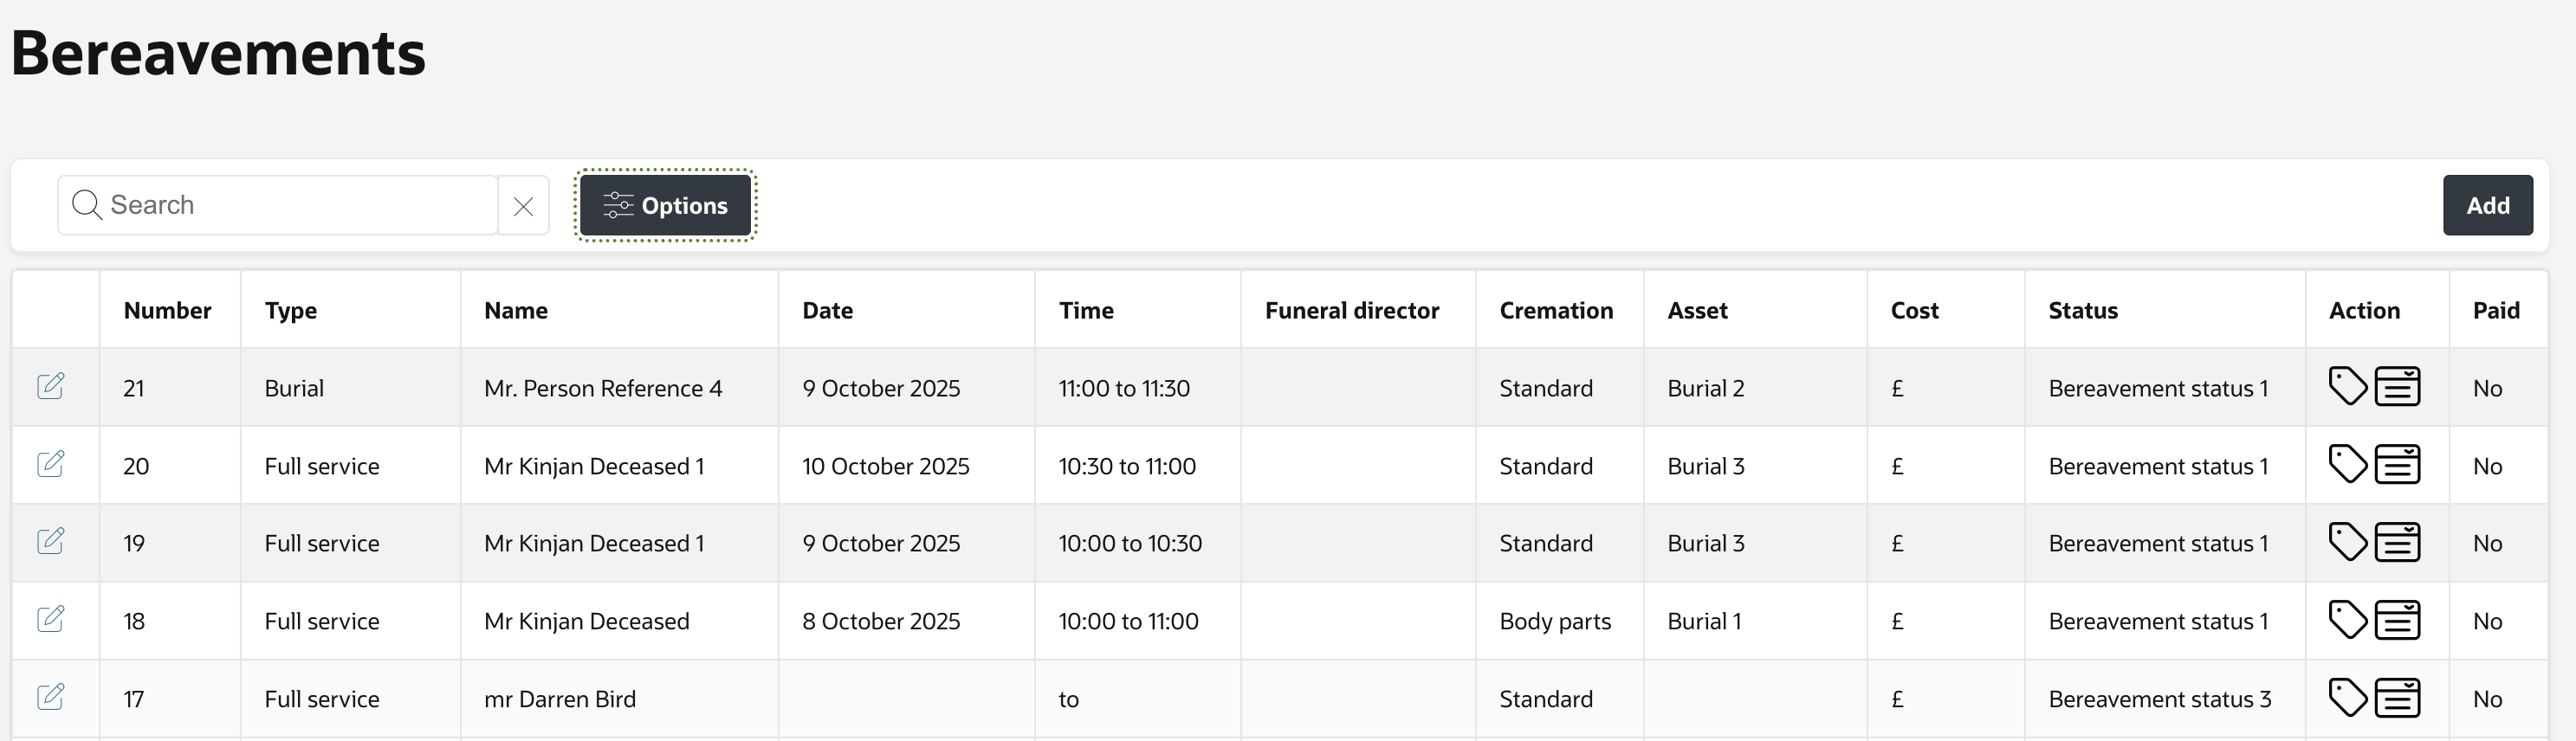
Searching and filtering records
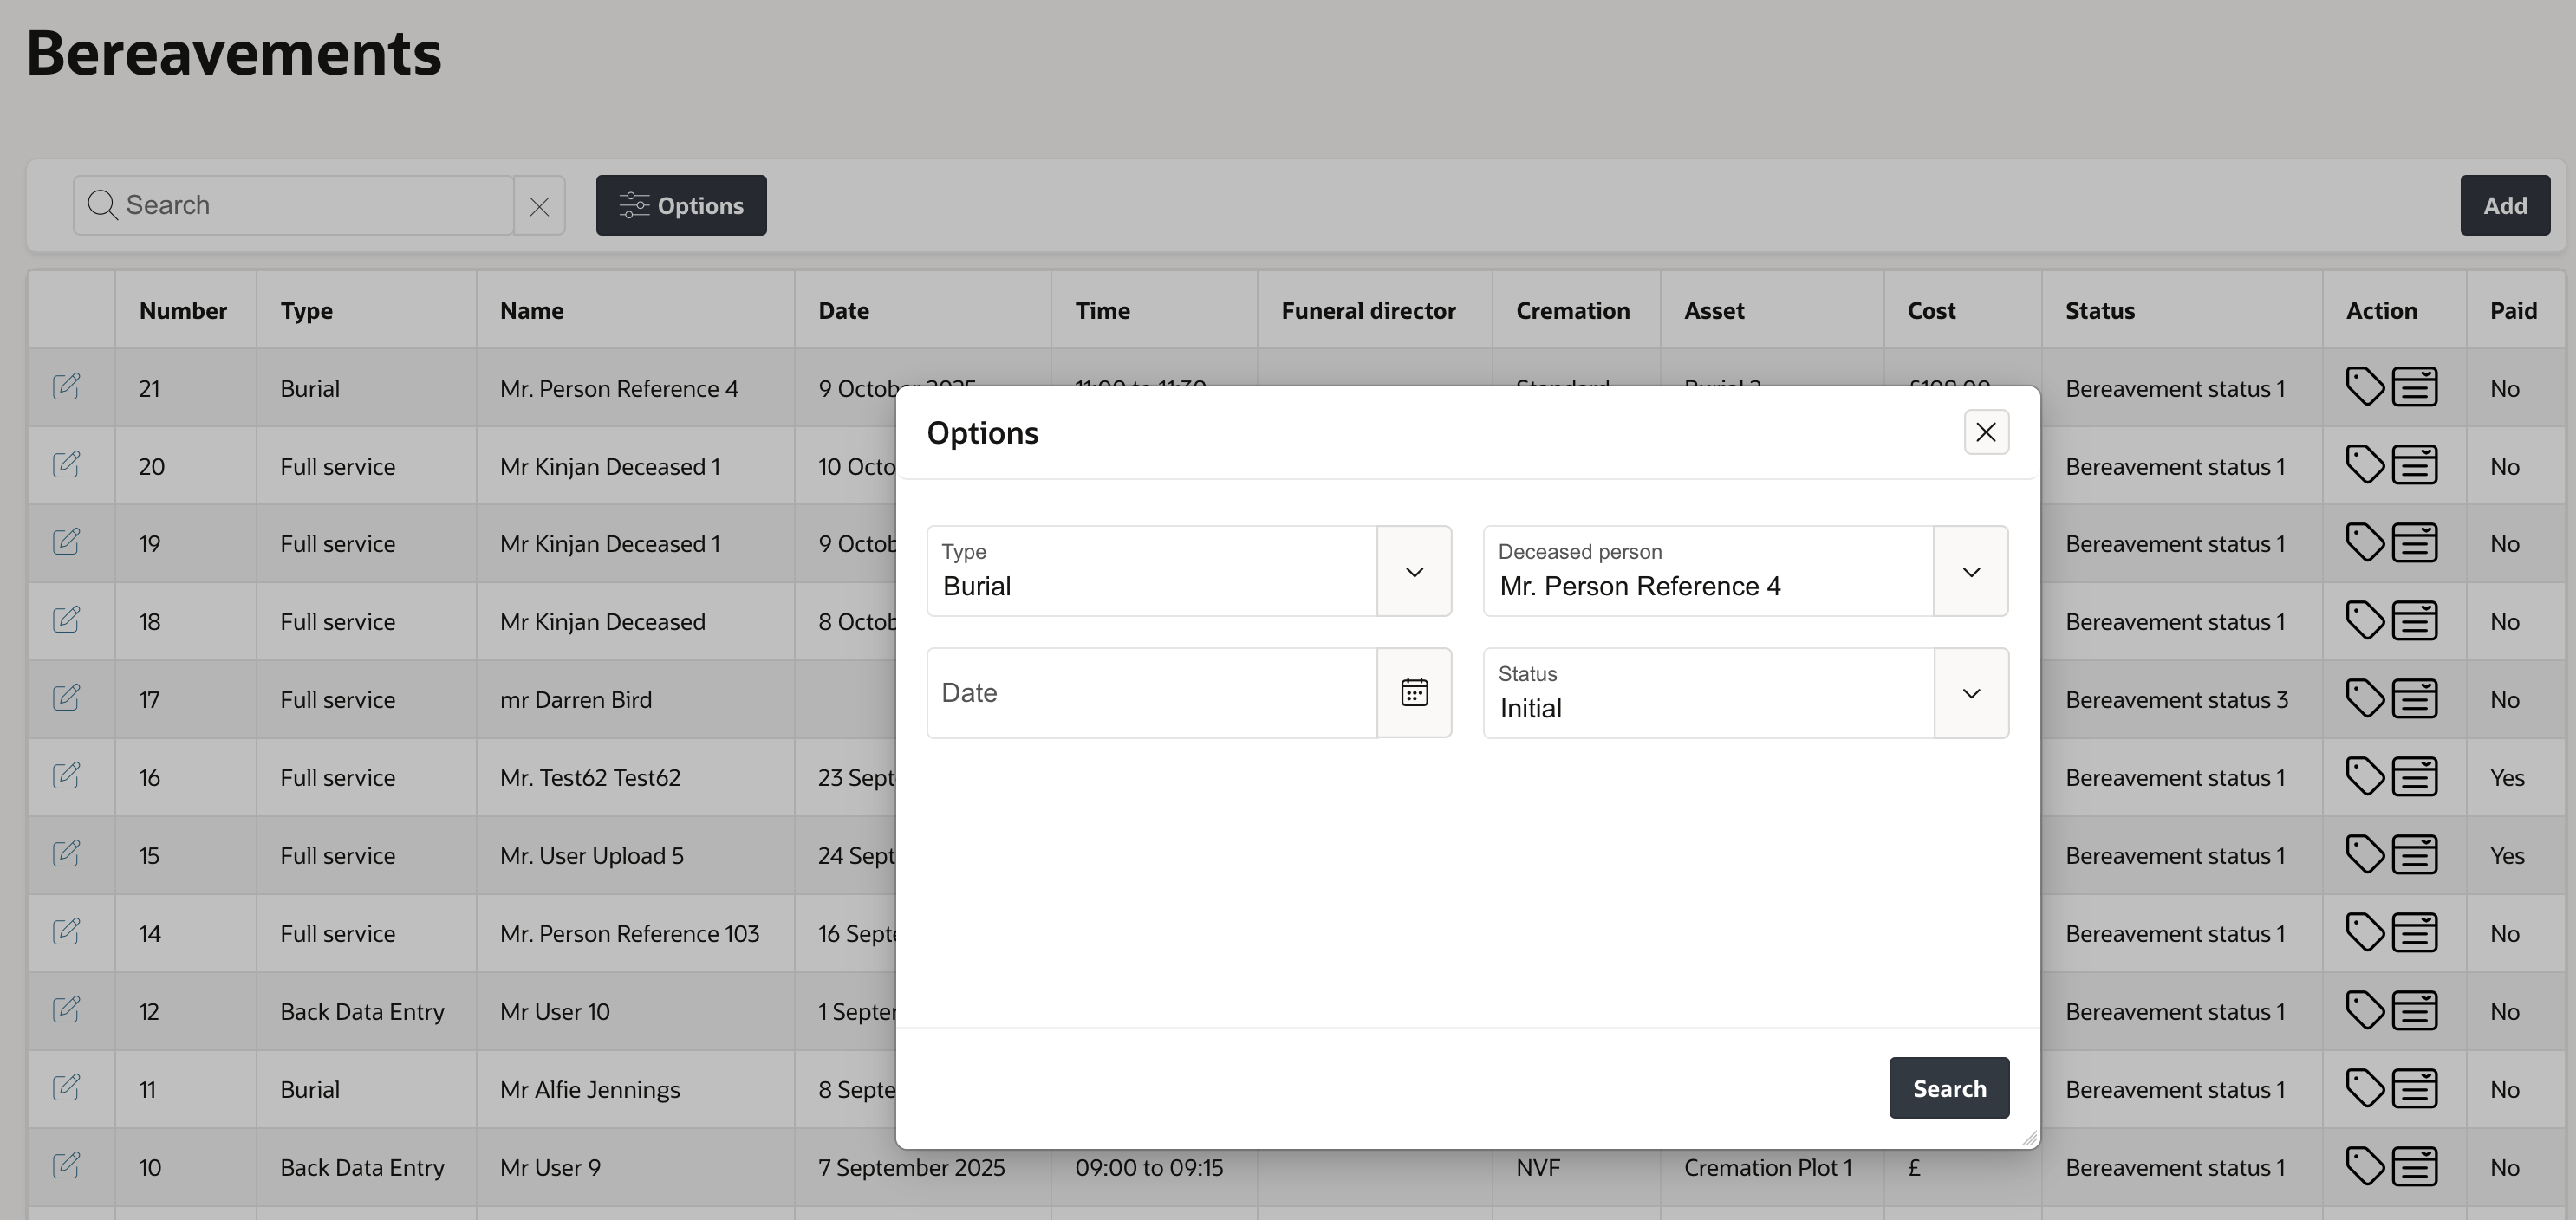
To view all bereavement records, navigate to the Bereavements tab.
You can search by bereavement number or use filters to narrow results by parameters such as type, date, or status.
From the record page, click Status to update the bereavement status as required.
Was this article helpful?
That’s Great!
Thank you for your feedback
Sorry! We couldn't be helpful
Thank you for your feedback
Feedback sent
We appreciate your effort and will try to fix the article