Introduction
About this guide
The Notify Person functionality allows Users to deliver targeted communications by segmenting customers based on defined criteria. This ensures messages are relevant and tailored to recipients.
Setting Up Notify Person
Configuration Steps
Go to Community > People > Actions > Notify People
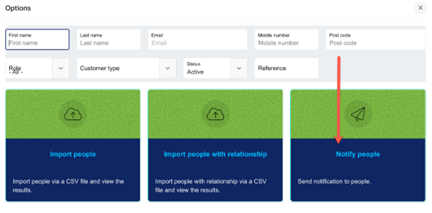
Options
To determine who the notification is sent to, you can select the following filter options, which are explained below:
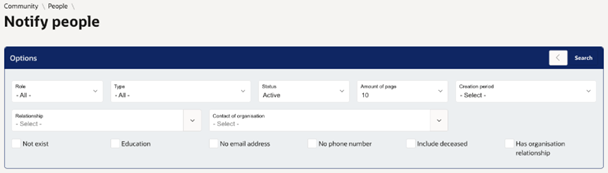
Role - Defines whether the notification is sent to customers or administrators, ensuring messages are appropriate for the recipient’s role.
Type - Customers can be assigned configurable types (e.g. student categories, councilors, business users) which can be used for segmentation.
Status - Each customer has a status such as Active, Suspended, or Deceased, allowing further control over communication targeting.
Relationship - Defines how customers are linked (e.g. Parent of, Carer of). Enables sending notifications to related individuals such as parents or carers.
Creation Period - Filter customers based on when they were created, e.g. newly imported within the last 2 weeks.
Amount per Batch - Controls how many notifications are sent at once to manage load and stagger communications. ‘Batch’ will send overnight using a scheduled process. This is recommended for larger number of emails.
No Email or Phone Number - Allows generating letters for customers without contact details or sending SMS only where mobile numbers exist.
Include Deceased - Optional setting to include or exclude deceased customers.
Not Exists - Allows targeting customers who have not completed an action within a defined period (e.g. follow-up reminders).
Education - Allows targeting customers who have a specific Transport Provider, Education Establishment or Entitlement. These defined within the person record, and Education section.
People
Once the filters are selected, click ‘Search’. The accounts matching the search criteria will be returned within the ‘Person’ region, as shown here:

From here, the appropriate person records can be selected. ‘Select All ‘is available for convenience.
Creating the Message
Here, a message can be typed manually, or an email template can be used. Notification messages can be saved as templates and reused for future communications, ensuring consistency and reducing setup time.
When creating the message, dynamic fields allow personalisation of notifications by inserting customer data into messages. These are automatically populated from the selected record during sending. The dynamic fields are explained below:
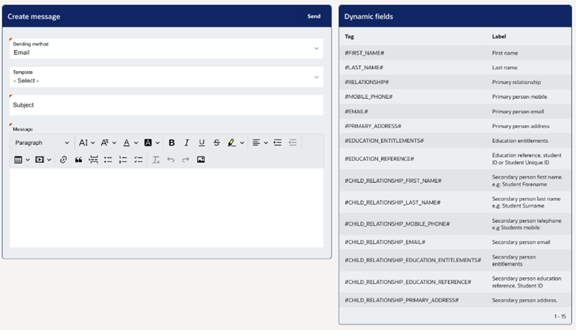
Primary Person Fields
- #FIRST_NAME# – First name
- #LAST_NAME# – Last name
- #RELATIONSHIP# – Relationship type
- #MOBILE_PHONE# – Mobile number
- #PRIMARY_ADDRESS# – Address
- #EDUCATION_ENTITLEMENTS# – Entitlements
- #EDUCATION_REFERENCE# – Education reference
Secondary Person Fields
- #CHILD_RELATIONSHIP_FIRST_NAME# – First name
- #CHILD_RELATIONSHIP_LAST_NAME# – Last name
- #CHILD_RELATIONSHIP_MOBILE_PHONE# – Mobile number
- #CHILD_RELATIONSHIP_PRIMARY_ADDRESS# – Address
- #CHILD_RELATIONSHIP_EDUCATION_ENTITLEMENTS# – Entitlements
- #CHILD_RELATIONSHIP_EDUCATION_REFERENCE# – Education reference
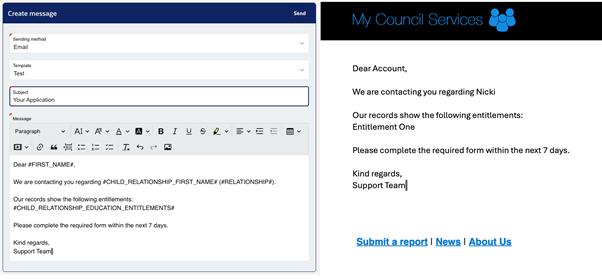
Below is an example of a notification’s configuration, with a side-by-side comparison of what the recipient would see:
Was this article helpful?
That’s Great!
Thank you for your feedback
Sorry! We couldn't be helpful
Thank you for your feedback
Feedback sent
We appreciate your effort and will try to fix the article