TABLE OF CONTENTS
- FOI request process
- Submitting an information request
- Viewing submitted requests
- Reviewing a request
- Adding information to a request
- Managing tasks
- Updating a request
- Analysing a request
- Verifying the requester
- Communicating with the requester
- Refusing a request
- Deleting a request
- Recording time
- Viewing request history
- Completing a standard FOI request
- Processing a Subject Access Request
FOI request process
The following provides a high-level view of the FOI request process:
- An information request is submitted by a resident, representative or Contact Centre Agent.
- The request becomes available in the Information module.
- An FOI User opens and reviews the request and its calculated due date.
- The request is assigned to an appropriate owner.
- Tasks are created manually or generated automatically, depending on the selected template.
- Information is collected and added to the request.
- The request is analysed, verified or updated where required.
- A response is prepared and sent to the requester.
- The request status is updated.
- The request is completed and its activity remains available in the request history.
FOI request deadlines
FOI requests have a response period of 20 working days. The response period is calculated from the day following receipt of the request as an example below:
- Where a request is received before 5:00pm, counting begins on the following working day.
- Where a request is received after 5:00pm, an additional day is applied before the working-day calculation begins.
- Weekends and bank holidays are excluded from the calculation.
- The request remains within its deadline until 23:59 on the due date.
- The request becomes overdue after the due date has passed.
For example:
- A request received before 5:00pm on 2 July starts its response period on 3 July.
- A request received after 5:00pm on 2 July starts its response period one day later.
- The calculated due date should be reviewed when the request is first opened.
Subject Access Request deadlines
Subject Access Requests use a different deadline calculation from FOI requests.
A Subject Access Request is due one calendar month from the date received. The calculation includes weekends and other non-working days.
The calculated due date should be reviewed when the request is first opened.
Important: The correct request template should be selected so that the appropriate deadline calculation is applied.
Submitting an information request
Public or customer submission
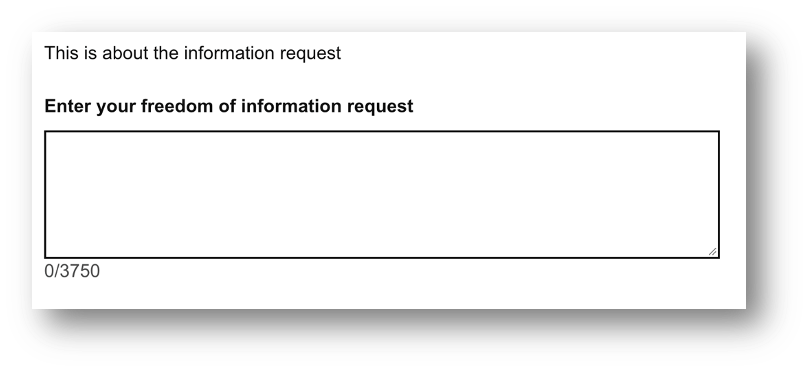
Residents and other requesters can submit information requests through the channels made available by the authority.
Available channels may include:
- Self-service portal.
- Configured online forms.
- The requester completes the relevant form and submits the information required to describe their request.
Contact Centre submission
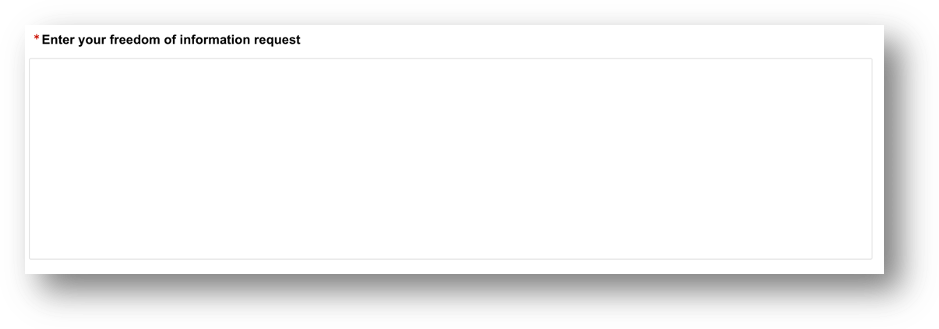
A Contact Centre Agent can submit an information request on behalf of a resident, representative or other requester. The agent should:
- Open the appropriate information request form through the Contact Centre.
- Enter the details provided by the requester.
- Complete all mandatory fields.
- Review the information entered.
- Submit the request.
Viewing submitted requests
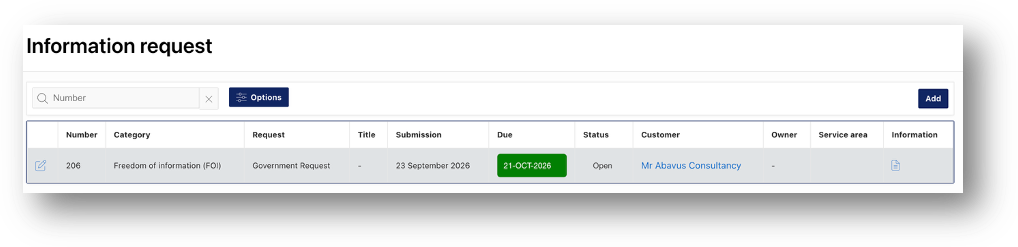
Submitted information requests are available in the Information module.
- Depending on their permissions, users can:
- View submitted requests.
- Filter the request list.
- Open an existing request.
- Add a new request.
- Edit an existing request.
- To review a request:
- Open the Information module.
- Use the available filters to locate the required request.
- Select the request to open its details.
The request list can be used to identify active requests, including requests that are open, in progress or awaiting clarification. Available filters can be used to refine the information displayed.
Deadline indicators
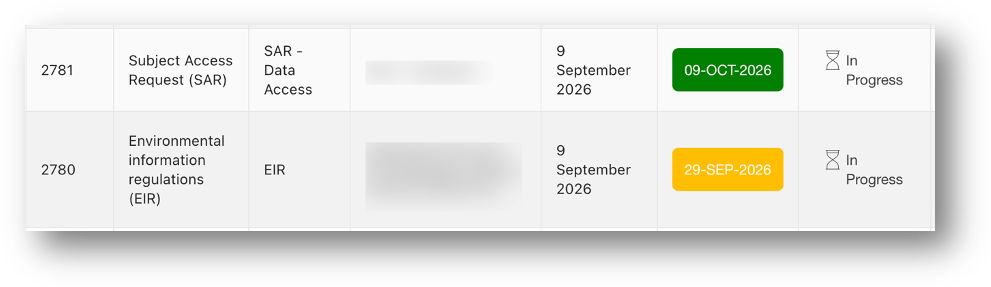
olour-coded deadline indicators help users identify requests that are approaching or have passed their due date.
Amber: The request is approaching its deadline or remains within its deadline on the due date.
Red: The request has passed its due date and is overdue.
A request should remain within its deadline until 23:59 on the due date. It should display as overdue only after the due date has passed.
Colour indicators support request monitoring. FOI Users should still review the calculated due date held against the request.
Reviewing a request
When a request is opened, the FOI User should review the available information before progressing it. This may include:
- Request details.
- Requester information.
- Date received.
- Calculated due date.
- Deadline indicator.
- Assigned FOI template.
- Current owner.
- Current status.
- Service area.
- Tasks.
- Checklist items.
- Attachments.
- Notes and interactions.
- Request history.
The FOI User should confirm that the correct FOI or Subject Access Request template has been applied and that the displayed due date is consistent with the relevant deadline rules.
Tasks may have been generated automatically where automatic task splitting has been enabled on the selected FOI template.
Adding information to a request
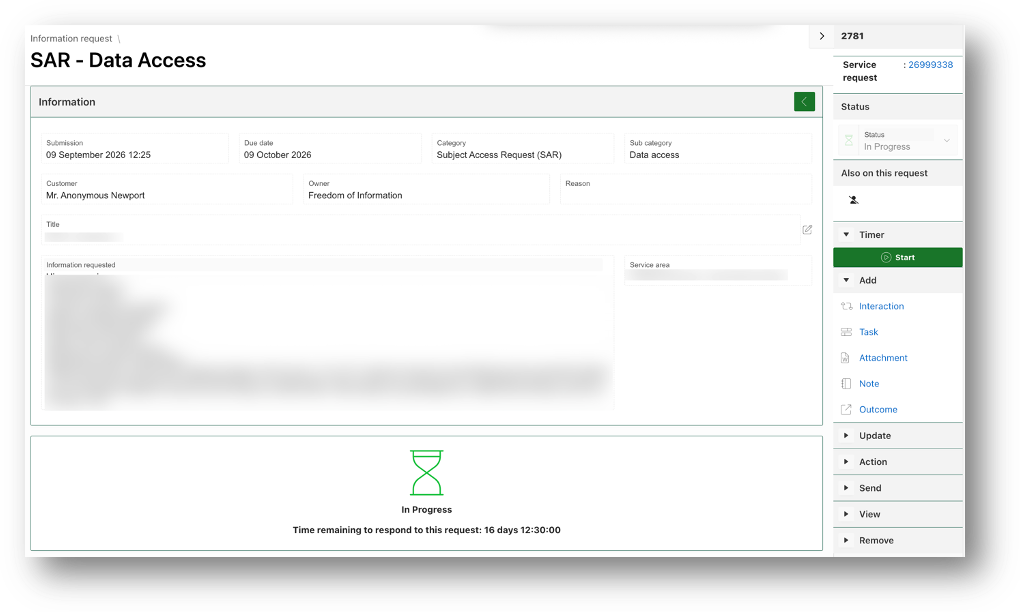
The Add menu is used to add activities or supporting information to an individual request.
Add an interaction
Add > Interaction
Use this option to record an interaction against the request. Interactions can be used to record activity associated with the request.
Add a task
Add > Task
Use this option to create a task against the request. Tasks can identify work that must be completed as part of processing the information request. Complete the available task details and assign the task to the appropriate user or team.
Add an attachment
Add > Attachment
Use this option to upload a document or file against the request. Attachments should be given a clear name so that their purpose can be understood by other users reviewing the request.
Add a note
Add > Note
Use this option to record additional information against the request. Notes should be:
- Clear and factual.
- Relevant to the processing of the request.
- Structured so that other users can understand the activity or decision recorded.
- Written with the expectation that they may form part of the request’s audit history.
Managing tasks
Automatically generated tasks
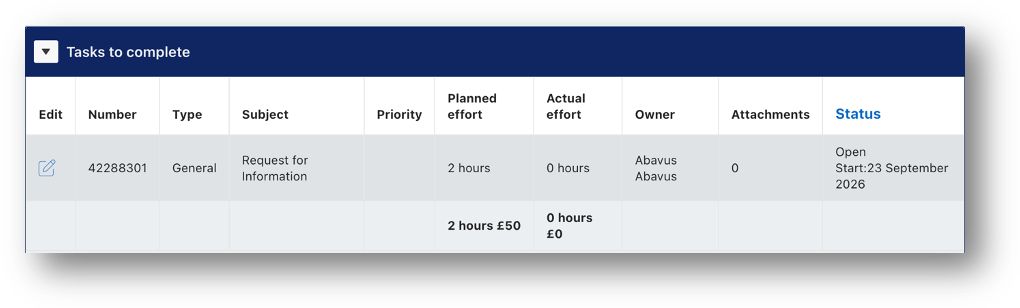
Tasks may be generated automatically based on the request content where the Automatically split requests into tasks option has been enabled for the FOI template. When automatically generated tasks are displayed, the FOI User should review them to ensure that they are relevant to the request.
Creating a task manually
If automatic task generation has not been enabled, or if additional work is identified, an FOI User can create a task manually.
Add > Task
Complete the available details and assign the task to the appropriate user or team.
Chasing an outstanding task
Action > Chase tasks
Use this option to manually chase an outstanding task. The source guide states that a note must be added to the task for this option to display. Manual task chasing is separate from any automatic reminder period configured against the FOI template.
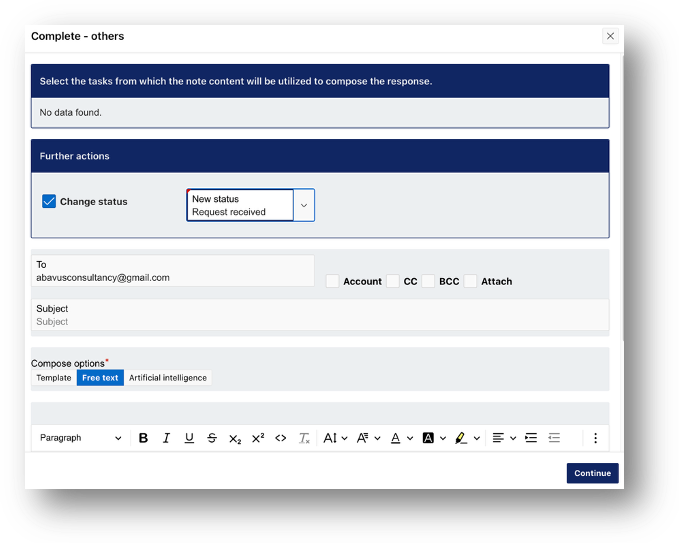
Completing a task
Action > Complete - Others
Use this option to complete an applicable task manually.
Updating a request
The Update menu is used to change information associated with an existing request.
Change the FOI template
Update > Template
Use this option to move the submitted request to a different FOI template where required. The user should check that the replacement template is appropriate before applying the change. Changing the template may affect:
- The deadline calculation.
- Existing tasks.
- Checklist items.
- Statuses.
- Status transitions.
- Available actions.
An error affecting template changes was reported as fixed in the relevant correspondence. After changing the template, review the request details and calculated due date before continuing.
Change the request owner
Update > Owner
Use this option to assign or change the owner of the request. The owner is the user responsible for managing or progressing the request. This corrects the source description, which repeats the template description under the Owner option.
Update the checklist
Update > Checklist
Use this option to update the checklist items associated with the request. Checklist items are determined by the selected FOI template and may be used to record completion of standard processing activities.
Update the request status
The status identifies the current stage of the request within the configured FOI lifecycle. The status should be updated as the request progresses. Available status changes are determined by the transition lifecycle associated with the FOI template.
Extend the due date
Where available, an authorised user can extend the due date of a request. An extension should only be applied where it is permitted by the relevant process, and the user is authorised to make the change. When extending a due date:
- Review the current due date.
- Confirm that the request is eligible for an extension.
- Enter the revised due date using the available extension function.
- Record the reason for the extension against the request.
- Check that the revised due date is displayed correctly.
- Confirm that the deadline indicator has been updated.
A due-date extension was identified as a requirement, particularly for Social Services requests. The available correspondence describes the function as work in progress intended for demonstration, so its production availability and exact operation should be confirmed.
Analysing a request
Action > Analyse
Use this option to access the available request analysis function. The analysis presents information against predefined questions to assist the FOI User in reviewing and understanding the request.
Where enabled, analysis can be accessed in connection with the relevant information request, allowing the user to review the analysis alongside the request details. The available correspondence describes this linked access as development work intended for demonstration, so its availability should be confirmed in the relevant environment.
The FOI User should review the analysis and consider it alongside:
- The original request.
- Any supporting information.
- Relevant documents.
- Applicable legislation.
- Organisational guidance.
Where the analysis has been generated using AI functionality, it should be treated as supporting information rather than a replacement for user review or professional judgement.
Verifying the requester
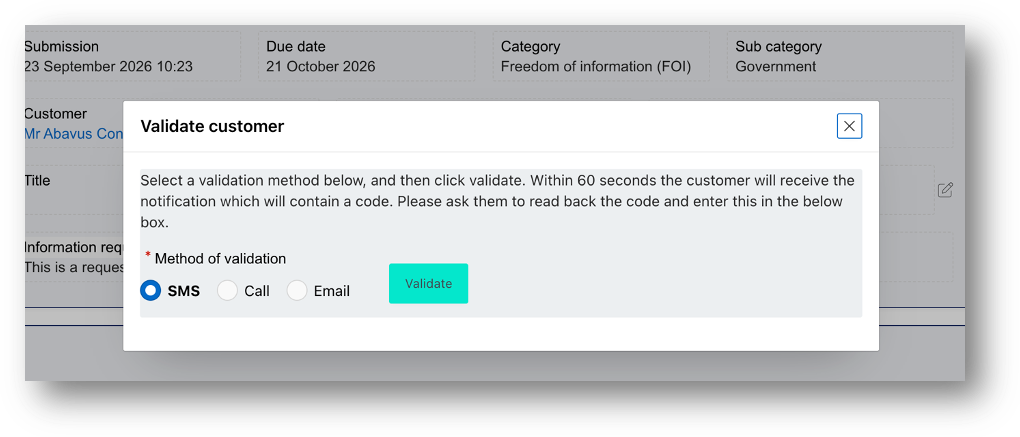
Action > Verify
Use this option to validate the requester using one of the available methods. The source guide lists:
- SMS.
- Telephone call.
- Email.
Select the appropriate option and follow the instructions displayed by the system.
Communicating with the requester
Send an email
Send > Email
Use this option to send an email to the requester. The source guide states that email content can be prepared using:
- A predefined template.
- Free text.
- AI-assisted content.
The FOI User should review the recipient, subject, message and any attachments before sending the email. All AI-assisted content should be reviewed for accuracy, suitability and accidental disclosure before it is sent.
Send an SMS message
Send > SMS
Use this option to send an SMS message to a mobile number. SMS messaging is a chargeable function. The FOI User should check the mobile number and message before sending it.
Refusing a request
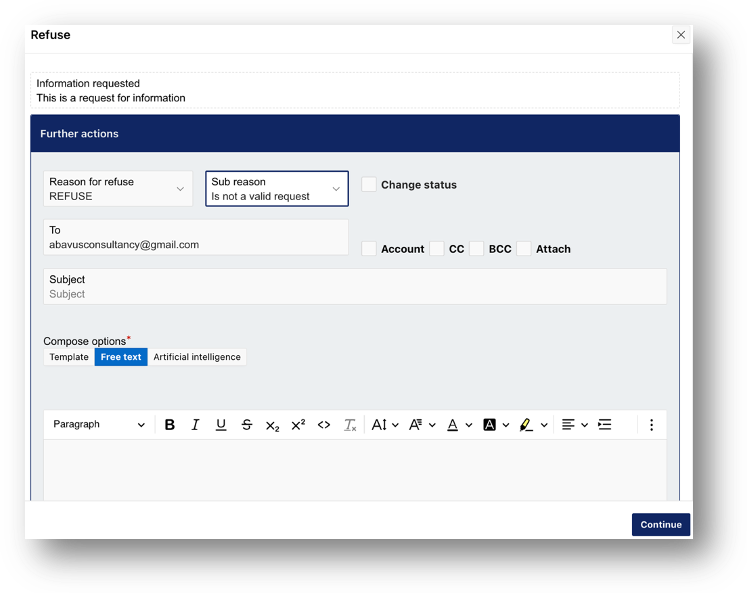
Action > Refusal
Use this option where the request does not meet the applicable FOI criteria and a valid reason for refusal is available. The Refusal action is available only where rejection has been enabled in the selected FOI template.
The user should:
- Review the request and the reason for refusal.
- Select or enter the applicable refusal reason.
- Prepare the notification to the requester.
- Review the notification.
- Send the refusal response.
- Check that the request status is correct.
Deleting a request
Action > Delete
Use this option to delete a request where the function is available. The Delete action is controlled by:
- The Allow delete option on the FOI template.
- The permissions assigned to the user.
Users should not delete a request unless they are authorised to do so and understand the effect on records and reporting.
Recording time
Where the timer has been enabled for the selected FOI template, an FOI User can start and stop the timer from the right-hand menu. The timer records time spent against the information request. The timer should be started when work begins and stopped when the activity has been completed or paused.

Viewing request history
View > History
Use this option to view the history of transactions and communications associated with the information request. Depending on the functions used, the history may include:
- Updates.
- Communications.
- Notes.
- Tasks.
- Ownership changes.
- Status changes.
- Due-date extensions.
This is the history of an individual request. It is separate from the configuration history of an FOI template.
Completing a standard FOI request
Before completing an FOI request, the FOI User should check that:
- The request has been reviewed.
- The calculated deadline has been checked.
- Required tasks have been completed.
- Relevant information has been collected.
- The response has been prepared and reviewed.
- The response has been sent to the requester.
- Relevant documents and communications are attached or recorded.
- Any permitted extension has been recorded.
- The request status is correct.
- The request outcome has been recorded for reporting purposes.
Processing a Subject Access Request
Complete - Subject access
Action > Complete - Subject access
This function allows an authorised user to prepare information held against the requester’s profile and send it to the requester to complete the request. The Subject Access Request due date should be checked before the request is completed.
Subject Access Requests are due one calendar month from the date received.
Select the information to include
The user can select one or more of the following information areas:
- Service request.
- Customer.
- Contract.
- Regulations.
Select only the information that is relevant to the request.
Preview and send the report
The available options allow the user to:
- Preview the report before sending.
- Send the report as an attachment.
- Change the status when the report is sent.
- Prepare the covering message using free text, a template or AI-assisted content.
- The user should review the report, recipient, message and attachments before sending them.
Was this article helpful?
That’s Great!
Thank you for your feedback
Sorry! We couldn't be helpful
Thank you for your feedback
Feedback sent
We appreciate your effort and will try to fix the article