Service Level Agreements allows an organization to monitor and time stages of a lifecycle of a Service Request and to notify where specific stages are near or have passed. A Service Level Agreement (SLA) policy is configured for different Service Request Types. It is based on Impact and considers working patterns and holidays within the policy
Key Objectives:-
Configuring SLA Impacts
Configuring SLA Holidays
Creating SLA Policy
SLA Rules
Creating Working Patterns
Pre-Requisites:-
- Basics
- Forms
- Administration
Configuring SLA Impacts
Go to Administration > Service Request and Case > Service Level Agreements > Impact
Impact relates to the priority or urgency of the Service Level agreement such as low, medium and high and and are usually derived from a question/answer sequence They can be configured to enable monitoring for different scenarios in a Service Request’s lifecycle. Multiple impacts can be included in a SLA policy as required. An impact consists of the following:-

- Update sequence - which let the user display the impact wherever they want in the list. Once satisfied with its position the user must click on update sequence (10),
- Title of Impact,
- Type of impact,
- Colour code,
- Indicator for impact,
- Font colour,
- Background colour,
- Start date,
- End date.
To configure an impact, select ‘+’

- Add a impact code - this can be an alphanumeric value,
- Add a title for the impact i.e. Urgent,
- Set what type of impact this requires to be set against - these are system pre-set values but are not displayed to the User,
- Set to enable,
- Start date if required,
- End date if required,
- Add a description of the impact if required,
- If the user requires they can set the styling of the impact.

Click on ‘Add Impact’.
The user will see that their impact type has been added to the list. They will now be able to include this in any SLA policy.
2. Configuring SLA Holidays
Go to Administration > Service Request and Case > Service Level Agreements > Holiday List
Holidays and Timings relates to the timings of the Service Level agreement and can be configured to enable monitoring for different scenarios in a Service Request’s lifecycle. This allows the user to add holidays such as Christmas Day, in order that the SLA timer can be put on hold if there is no service for a particular Service Request that day. For timings, the Service Level will only run on the days of the week configured.
The ‘Holiday List’ consists of the following:-
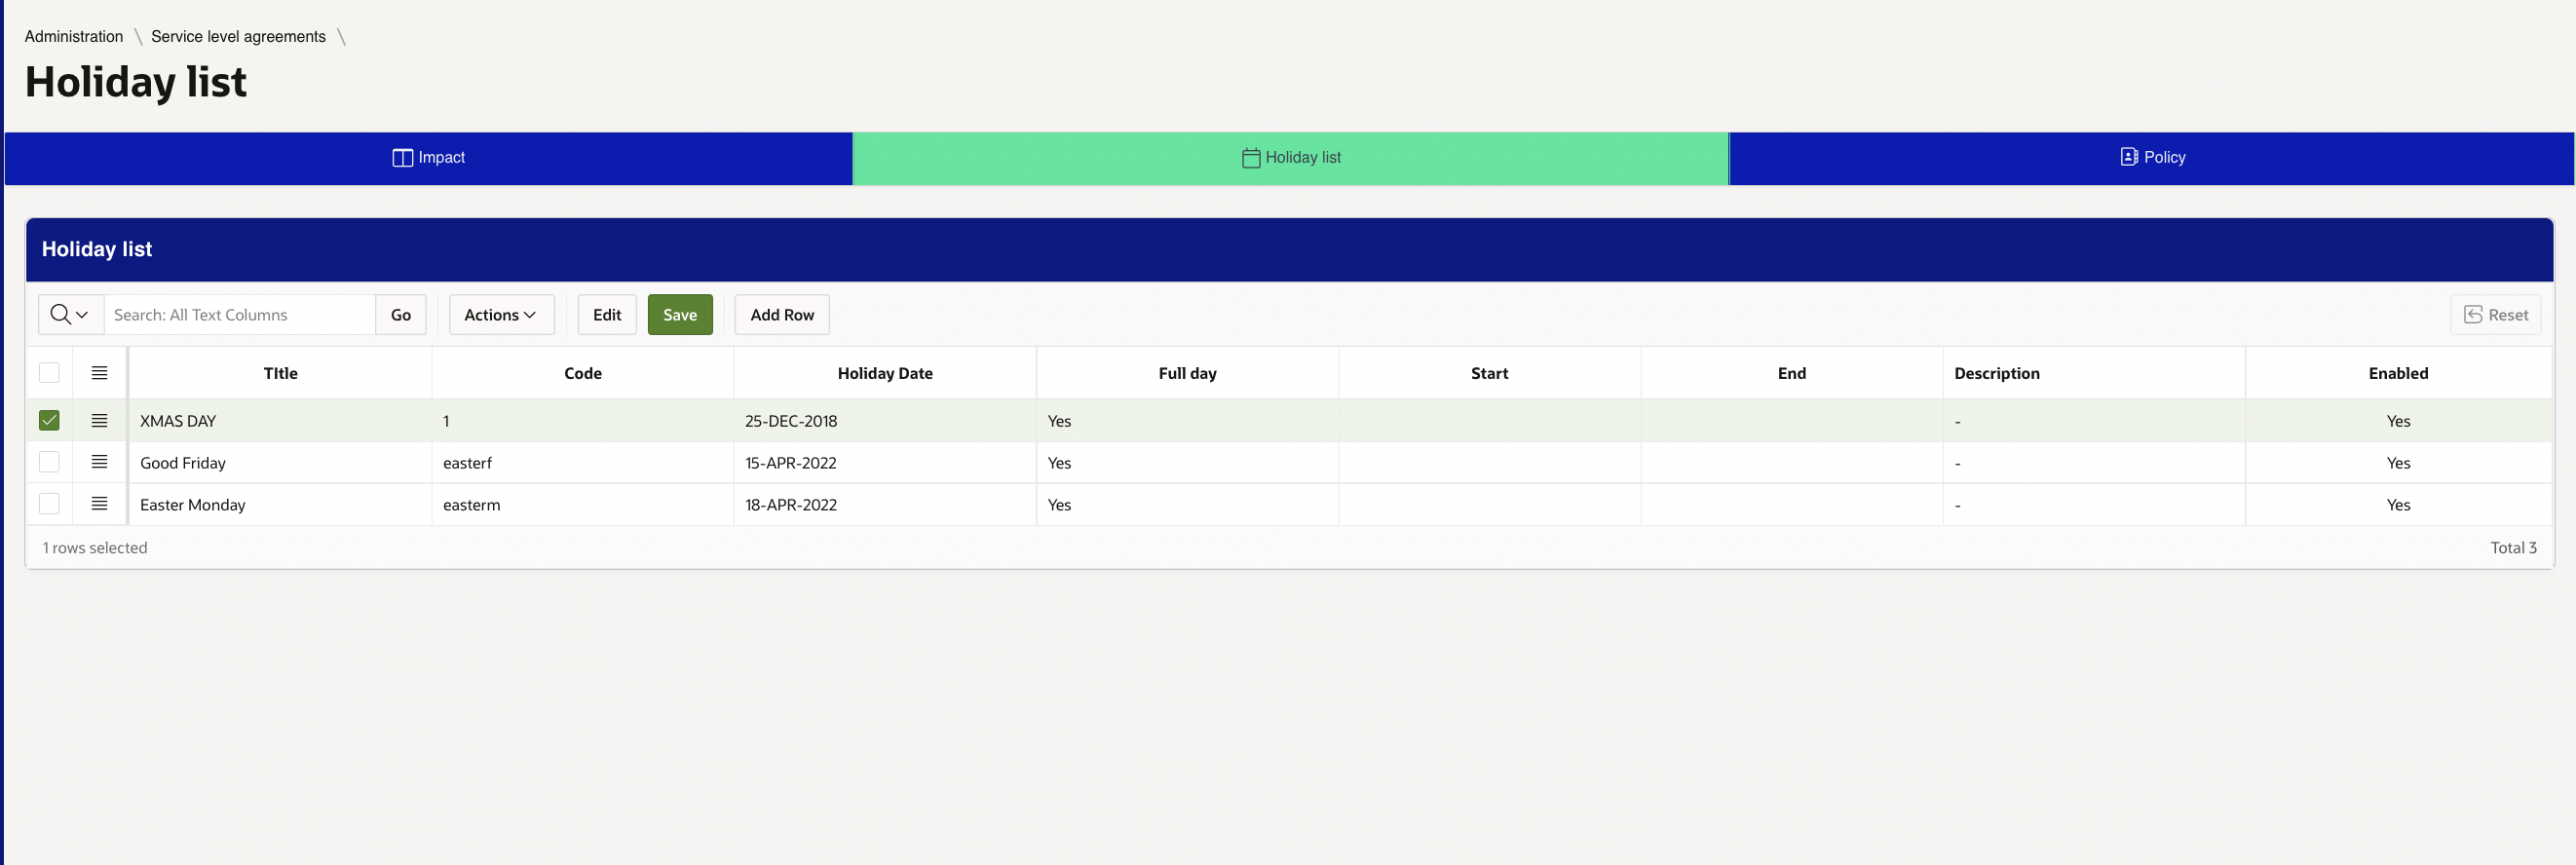
- Title of Holiday
- Code - this can be an alphanumeric value,
- Holiday date,
- Whether it is a full day - the timings will only consider a holiday if it is a full day,
- Start date (not applicable if full day selected),
- End date Start date (not applicable if full day selected),
- Enabled,
- Description,
Timings (working patterns) are configured within the SLA Policy.
3. Configuring SLA Policy
Go to Administration > Service Request and Case > Service Level Agreements > Policy
Once the Impact and Holidays have been configured, a Service Level Agreement Policy can be configured.
To add a policy, select ‘add’:-
- Enter a Name for the Policy,
- Select a work pattern,
- Type of report set against SLA, select Service Requests,
- By clicking on ‘Create’ policy the name of the SLA policy is saved but MUST be amended later,
- By clicking ‘Continue’ the user can set the policy with a work pattern etc.

Once the SLA Policy is saved, ensure the following is configured:-
A. Policy Detail - select a ‘Type’ (Service Request only), enter a Name and select ‘enabled’. A description can be added and start and end dates selected if required.

B. Timer - this sets the statuses for each stage of the policy. When a Service Request is placed in these statuses, the Policy is executed with the Timer and Targets configured. Select a status for each timer element:-

Initial - this is the initial status of the Service request and any Service Requests will need to be placed into the status denoted here for timings to start. This is used to allocate a ‘respond to’ time for the Service Request as a ‘Target’.
Hold - will hold the timings on the policy. If a Service Request is placed in this status or statuses, it will appear with a Target of ‘On hold’.
Respond - this is the status which the Service Request will require any planning to deal with the relevant issue. This is used to allocate a ‘Plan before’ time for the Service Request as a ‘Target;.
Planned - this is the status which the Service Request will require any work to resolve the relevant issue. This is used to allocate a ‘Resolve before’ time for the Service Request as a ‘Target’.
Resolve - this is the status which the Service Request will be updated to once resolved or no further action required. This is used to allocate a ‘Resolved’ time for the Service Request as a ‘Target’.
C. Target - this sets the targets agains the impact as in line with SLA.
Set the timings for the Targets based on the Impact. The statuses configured in ‘Timer’ section will denote which Target is used.

Notify before and After settings are used for Notification to the relevant person. Appropriate rules will be required.
Timings are recorded in hours. If you require your timings to be more than 1 day you will need to enter the number of minutes for a working day or days e.g. if a working day is 8 hours and you require a timing of 3 days, enter 24 hours. Hours can be entered with a decimal place.4.
The user can select a work pattern which is applicable to individual SLAs. These are configured in Administration > Workforce > Work Patterns.
D. Timing - this sets the timings in days and hours which the SLA policy applies to it’s Targets.
Add the relevant days of the week with the timings set. A work pattern can be used to pre-set these timings by selecting ‘Select timing’ (work patterns are set separately). The SLA policy will be applied for days of the week and any times specified between start and end.

It is advised to match the number of hours between start and end time to the hours denoted in your Targets i.e. if working day is 8 hours, start and end time should reflect this.
E - Holiday - this sets the holidays here which the SLA policy ignores to it’s Targets
If the SLA is set against a Service Request etc where the timer would be required to halt on a certain holiday date the the user can choose the required holiday(s) by clicking on select holiday as below.

4. Configuring SLA Rules
There are two separate rule events:-
1. Applying an SLA’s to a Form - this will apply the Policy and start timings on any ‘Targets’ defined in the policy,
A rule with a Type of ‘When’ and an event of ‘Service Request submitted’ should be used.

Set the condition to the Form, Question/Answer on a Form which will trigger the SLA:-

Set the action to ‘Assign Service Level Agreement’ :-

The Impact will need to be defined within the select SLA Policy.
Once the rule is applied and a SR is submitted the impact as designated by the SLA/Report rule will display on service desk as below.
In the actual SR the time left to deal with this issue will be displayed as below:

2. Monitoring the SLA and any required actions - this will monitor according to the policy based on statuses which are set in the ‘Timer’ section of the policy.
A rule with a Type of ‘Monitor’ and an event of ‘SLA’ should be used. These Rules cannot be set up without asking one of the Abavus team members.

5. Configuring Work Patterns
To set a pre-defined working pattern within an SLA policy, it is necessary to create a Work Pattern..
Go to Administration > Workforce > Work Pattern:-
To add click on the add icon:-

Enter the timings as required. Click ‘Add row’ to add additional days. Once complete the user should click on ‘Apply changes’.
Was this article helpful?
That’s Great!
Thank you for your feedback
Sorry! We couldn't be helpful
Thank you for your feedback
Feedback sent
We appreciate your effort and will try to fix the article